Busting other yoga myths with biomechanics

Unlike some of the improbable myths that the gals over at Smarterbodies take on in their new ebook Exposing Yoga Myths, yoga teachers could be forgiven for their misconceptions about demands placed on joints and muscles in common balancing asanas. In fact, nobody was more surprised at what is actually happening than Dr. George Salem, lead researcher for the Yoga Empowers Senior Study (YESS). Dr. Salem is Director of the Musculoskeletal Biomechanics Research Laboratory, Director of the Human Anatomy Program, directs the Exercise and Aging Biomechanics research program; and is Associate Professor in the Division of Biokinesiology & Physical Therapy at the University of Southern California.

In the study that is the subject of this post, Dr. Salem and his team used standard biomechanical analysis (joint moments of force and EMG measurements of muscle activation patterns) to examine physical demands placed on older persons, average 70 years old, performing three common variations each of Vrksasana (Tree) and Uthitta Hasta padangustasana (single leg balance).  Here’s what they discovered.

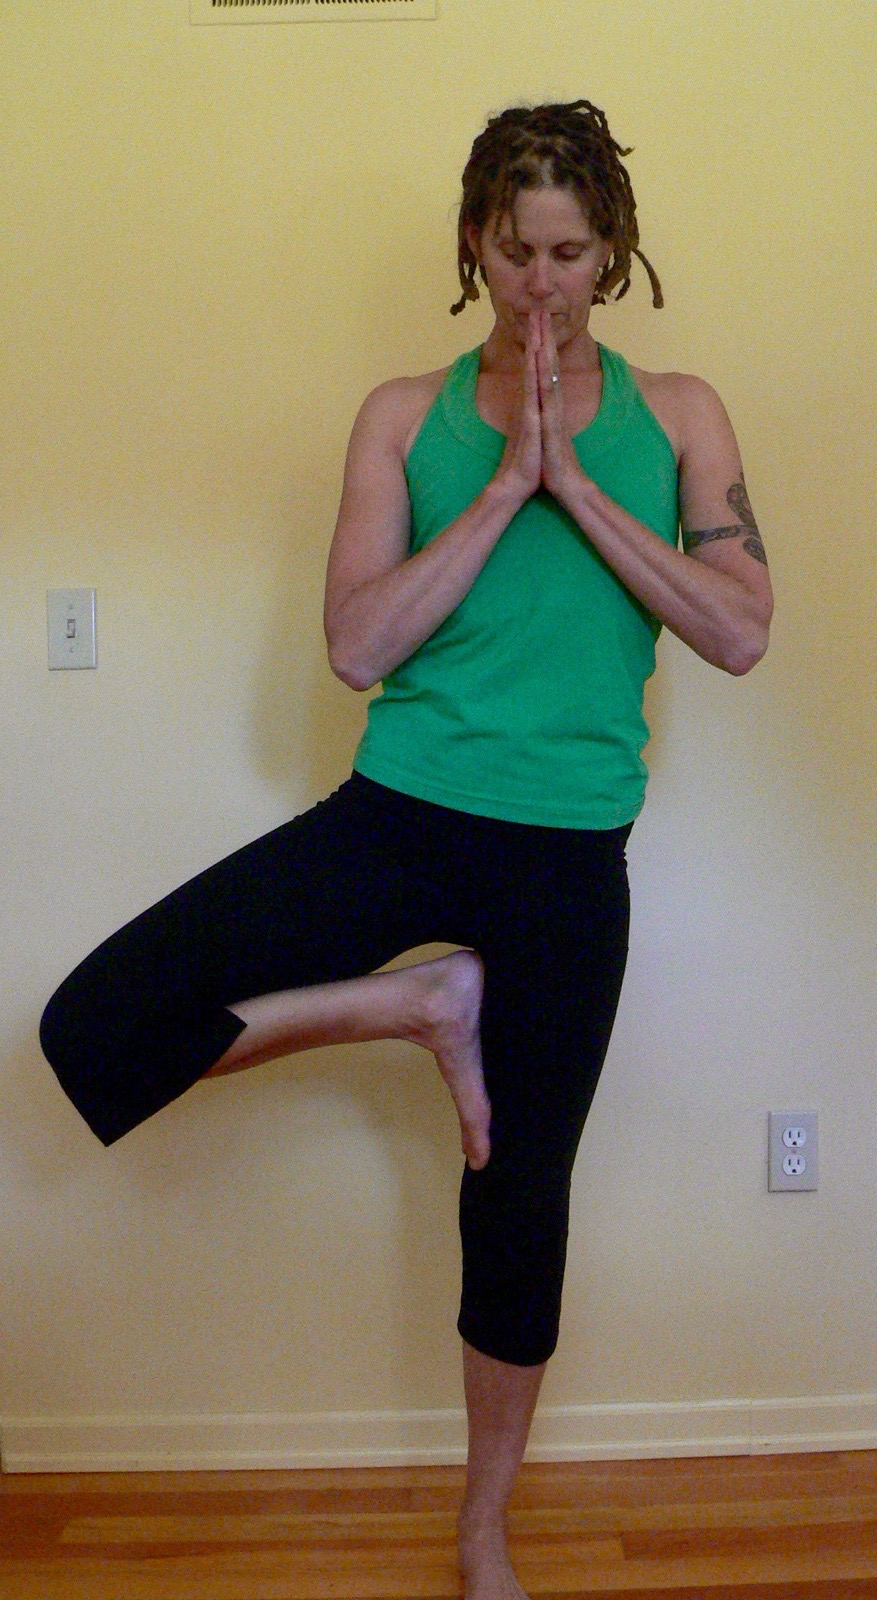
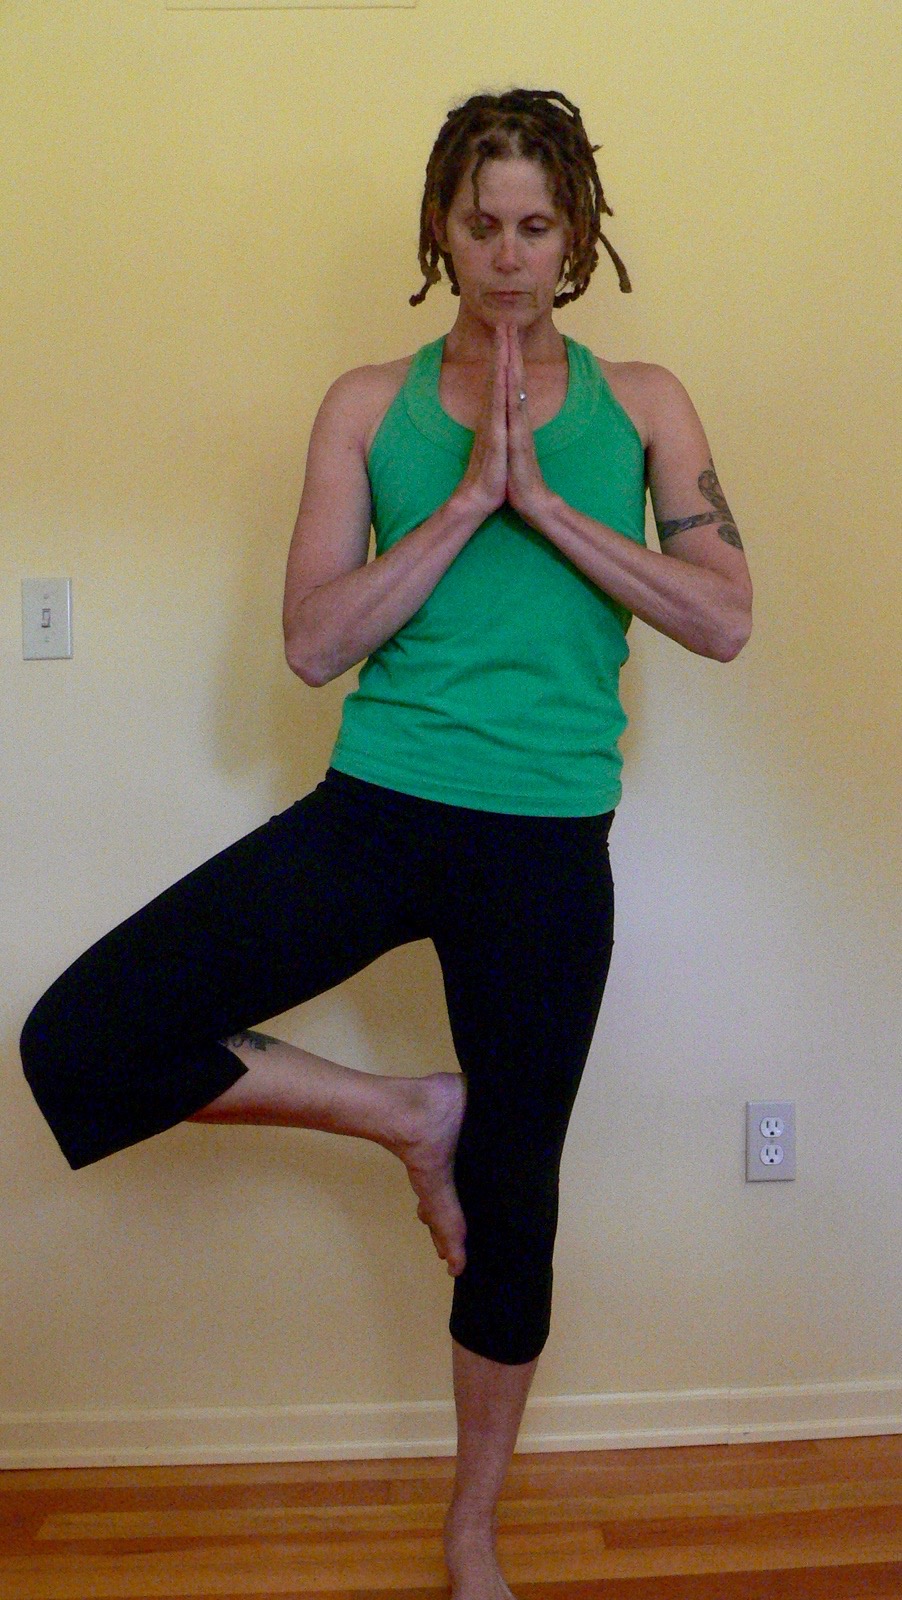
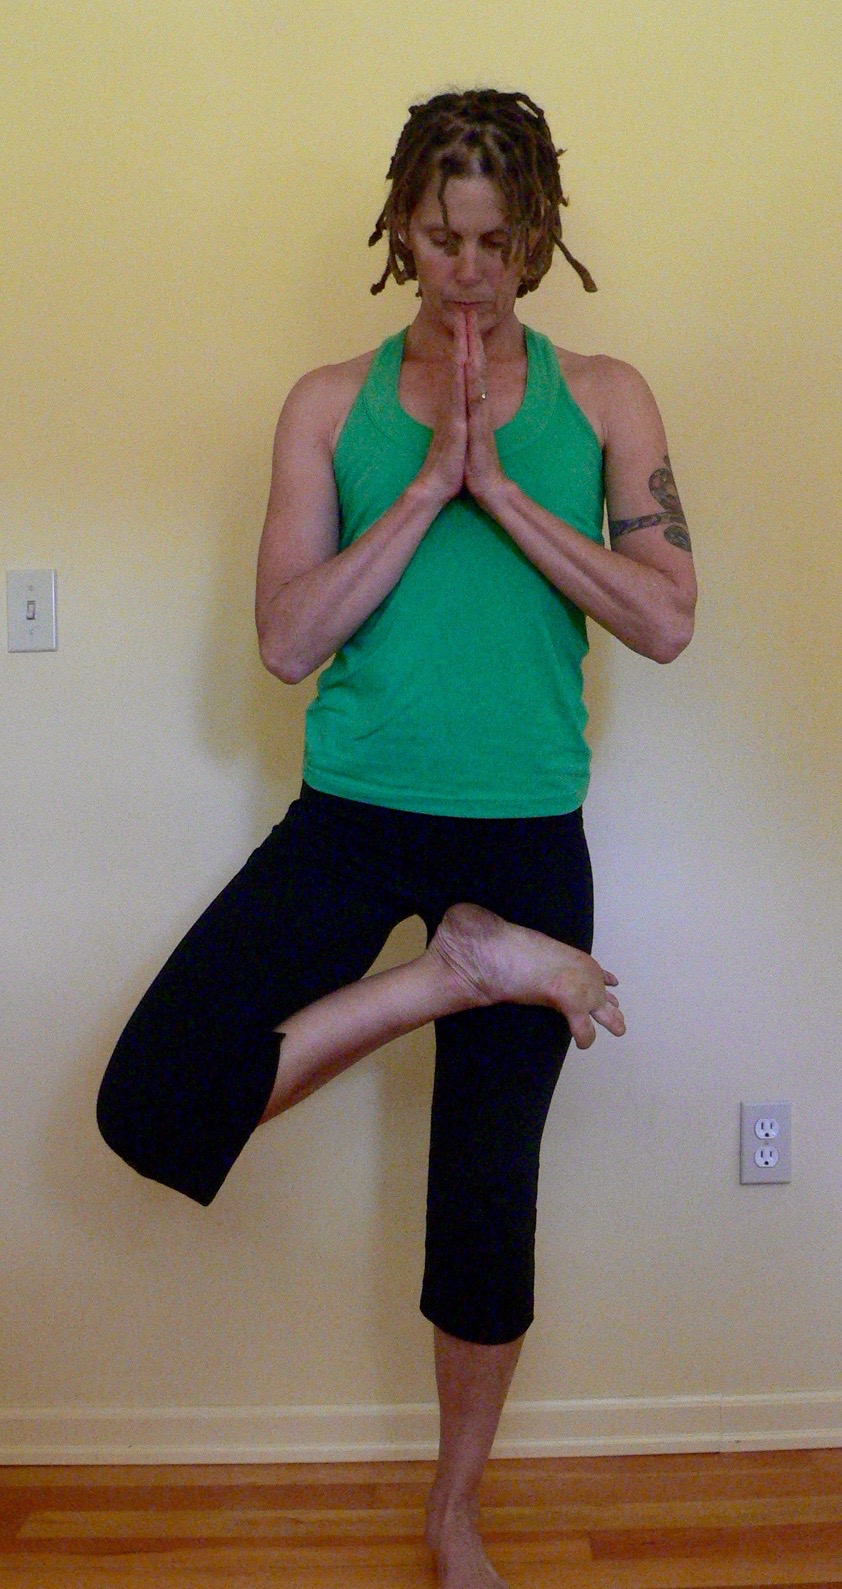
Vrksasana (tree pose)

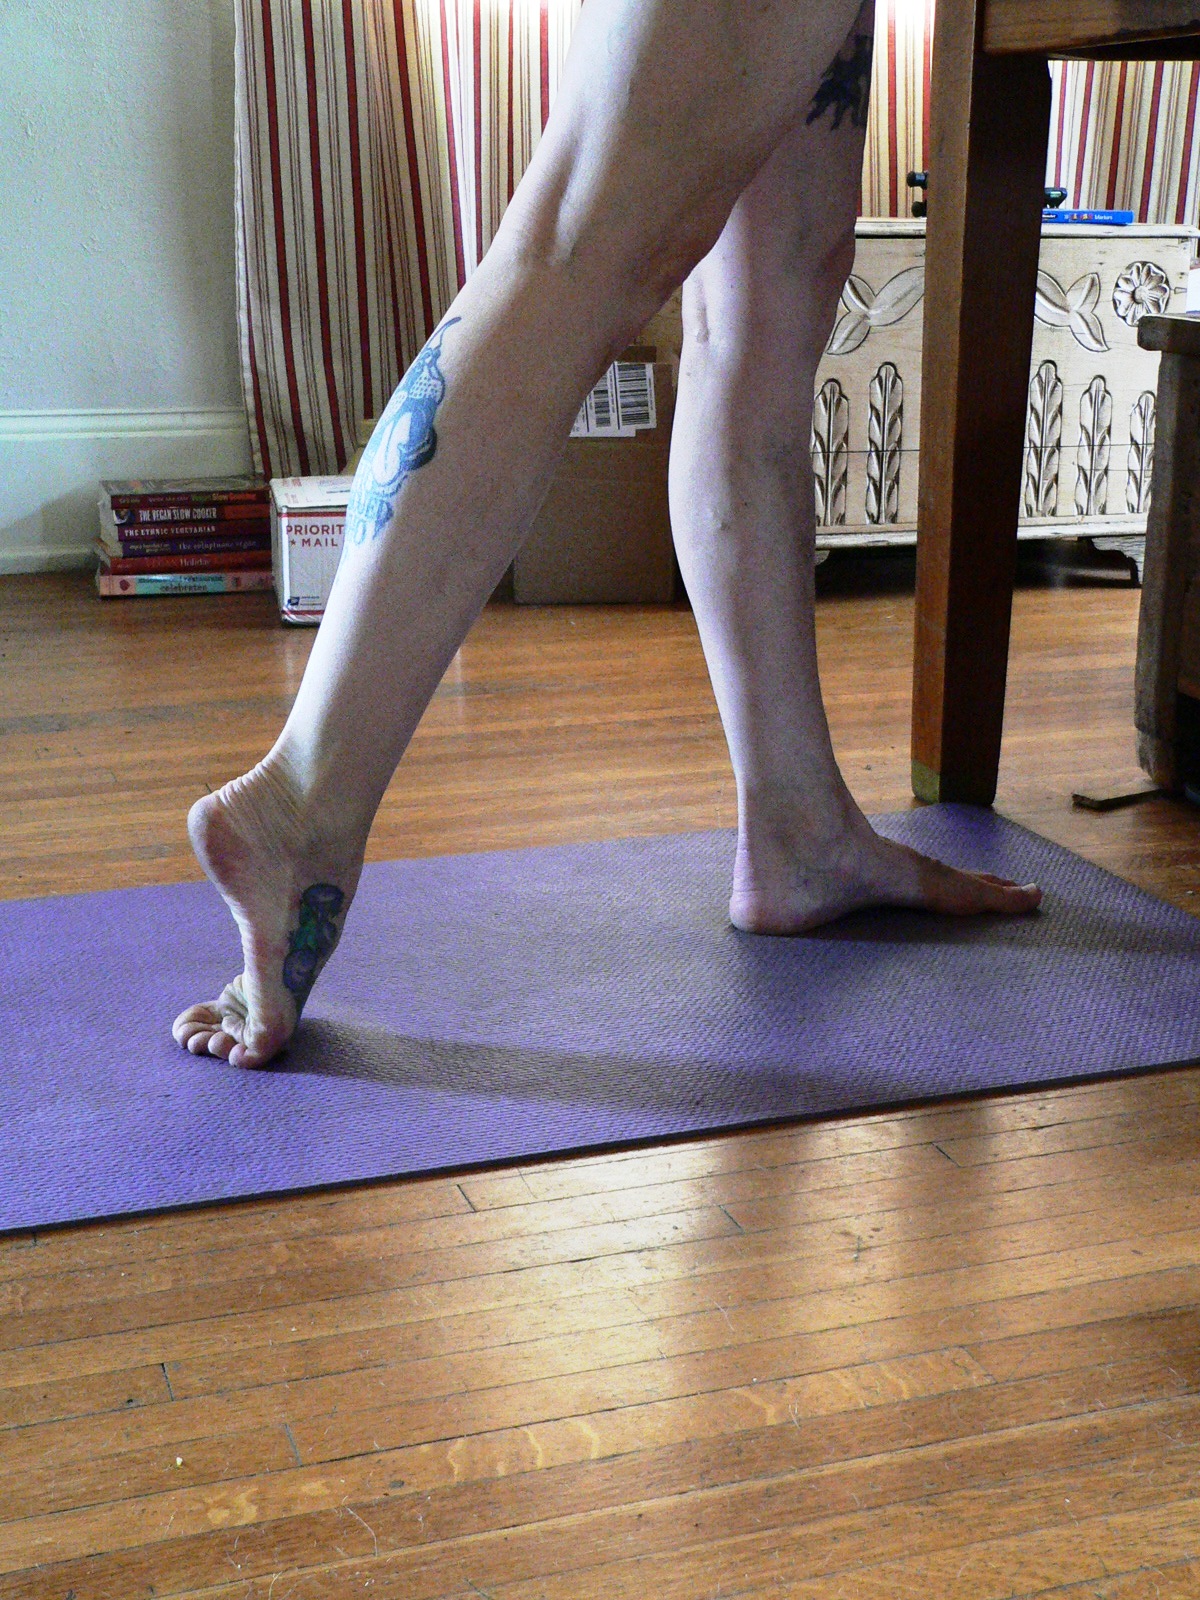
Because it can become confusing, use this key for translating beginner, intermediate, and advanced vrksasana. You can see a visual here.

  • beginner = toes of non-stance leg touching the floor; hands on wall
  • intermediate = only stance foot touches ground; hands on wall
  • advanced = only stance foot touches ground; no wall support

They hypothesized that the beginner variation, which was done with toes on the floor and heel against the inside of the shank (lower leg) of the stance leg and using a hand on the wall for support, would be the least physically demanding . The intermediate variation, which had the entirety of the foot on the stance shank, but still holding the wall, would be more physically demanding. The advanced variation, which was classic vrksasana, with foot on shank and no wall support would be the most physically demanding. They hypothesized that the increase in physical demands would be linear. They were wrong.

Progressing

What they found was that there was a large increase in demand going from tree with the toes on the ground and wall support (beginner tree) to tree with the foot off the ground and wall support (intermediate tree). And there was not much change at all between having or not having wall support, when only the stance foot was grounded. Providing wall support doesn’t lessen demand nearly as much as lifting the toes from the mat.  This suggests that more time may be needed practicing the beginner variation before transitioning to the intermediate variation. Because older persons have diminished strength and balance, reduced joint range of motion, and a greater prevalence of osteoarthritis, some variations of what are seemingly appropriate asanas may place them at risk for musculoskeletal and neurological pain and injury. And while increased muscle loading may improve strength and endurance, excessively high joint moments of force may lead to damaging loads to joint structures and exacerbate osteoarthritis and other pathological joint issues.

Recommendation: In working with older persons in vrksasana, when they are ready to progress from the beginning variation, have them keep their toes on the floor and move away from the wall, rather than having them lift their toes while staying at the wall.

Hip Strength

Another finding was that advanced tree and intermediate tree (both with non-stance foot off the ground) were nearly identical in the physical demands of the lateral hip musculature aka abductors aka gluteus medius. Thus, there appeared to be no adaptive benefit to stepping away from the wall, when you are already balancing on one leg (toes of non-stance leg not on the ground). Thus, for students who feel safer holding onto a wall, they are gaining as much improvement in strength and endurance as those not holding the wall. Strong abductors are associated with better balance and reduced fall risk.

Recommendation: Let your students know that holding onto the wall does not undermine hip strength and will  effectively assist them in achieving better balance, decrease fear of falling and performance anxiety in class, and build confidence. 

Knee Safety

A really important finding has implications for students with knee issues. Intermediate and advanced tree pose increases loading of joint structures. Unfortunately, such loading characteristics are associated with knee osteoarthritis and joint pain, thus could exacerbate preexisting conditions. Importantly, and in contrast to commonly held conceptions, the use of a wall for support during these variations of Vrksasana does not offer protection for the knee joint.

Recommendation: For senior students with existing knee problems, suggest they stick with the beginner version of Vrksasana.

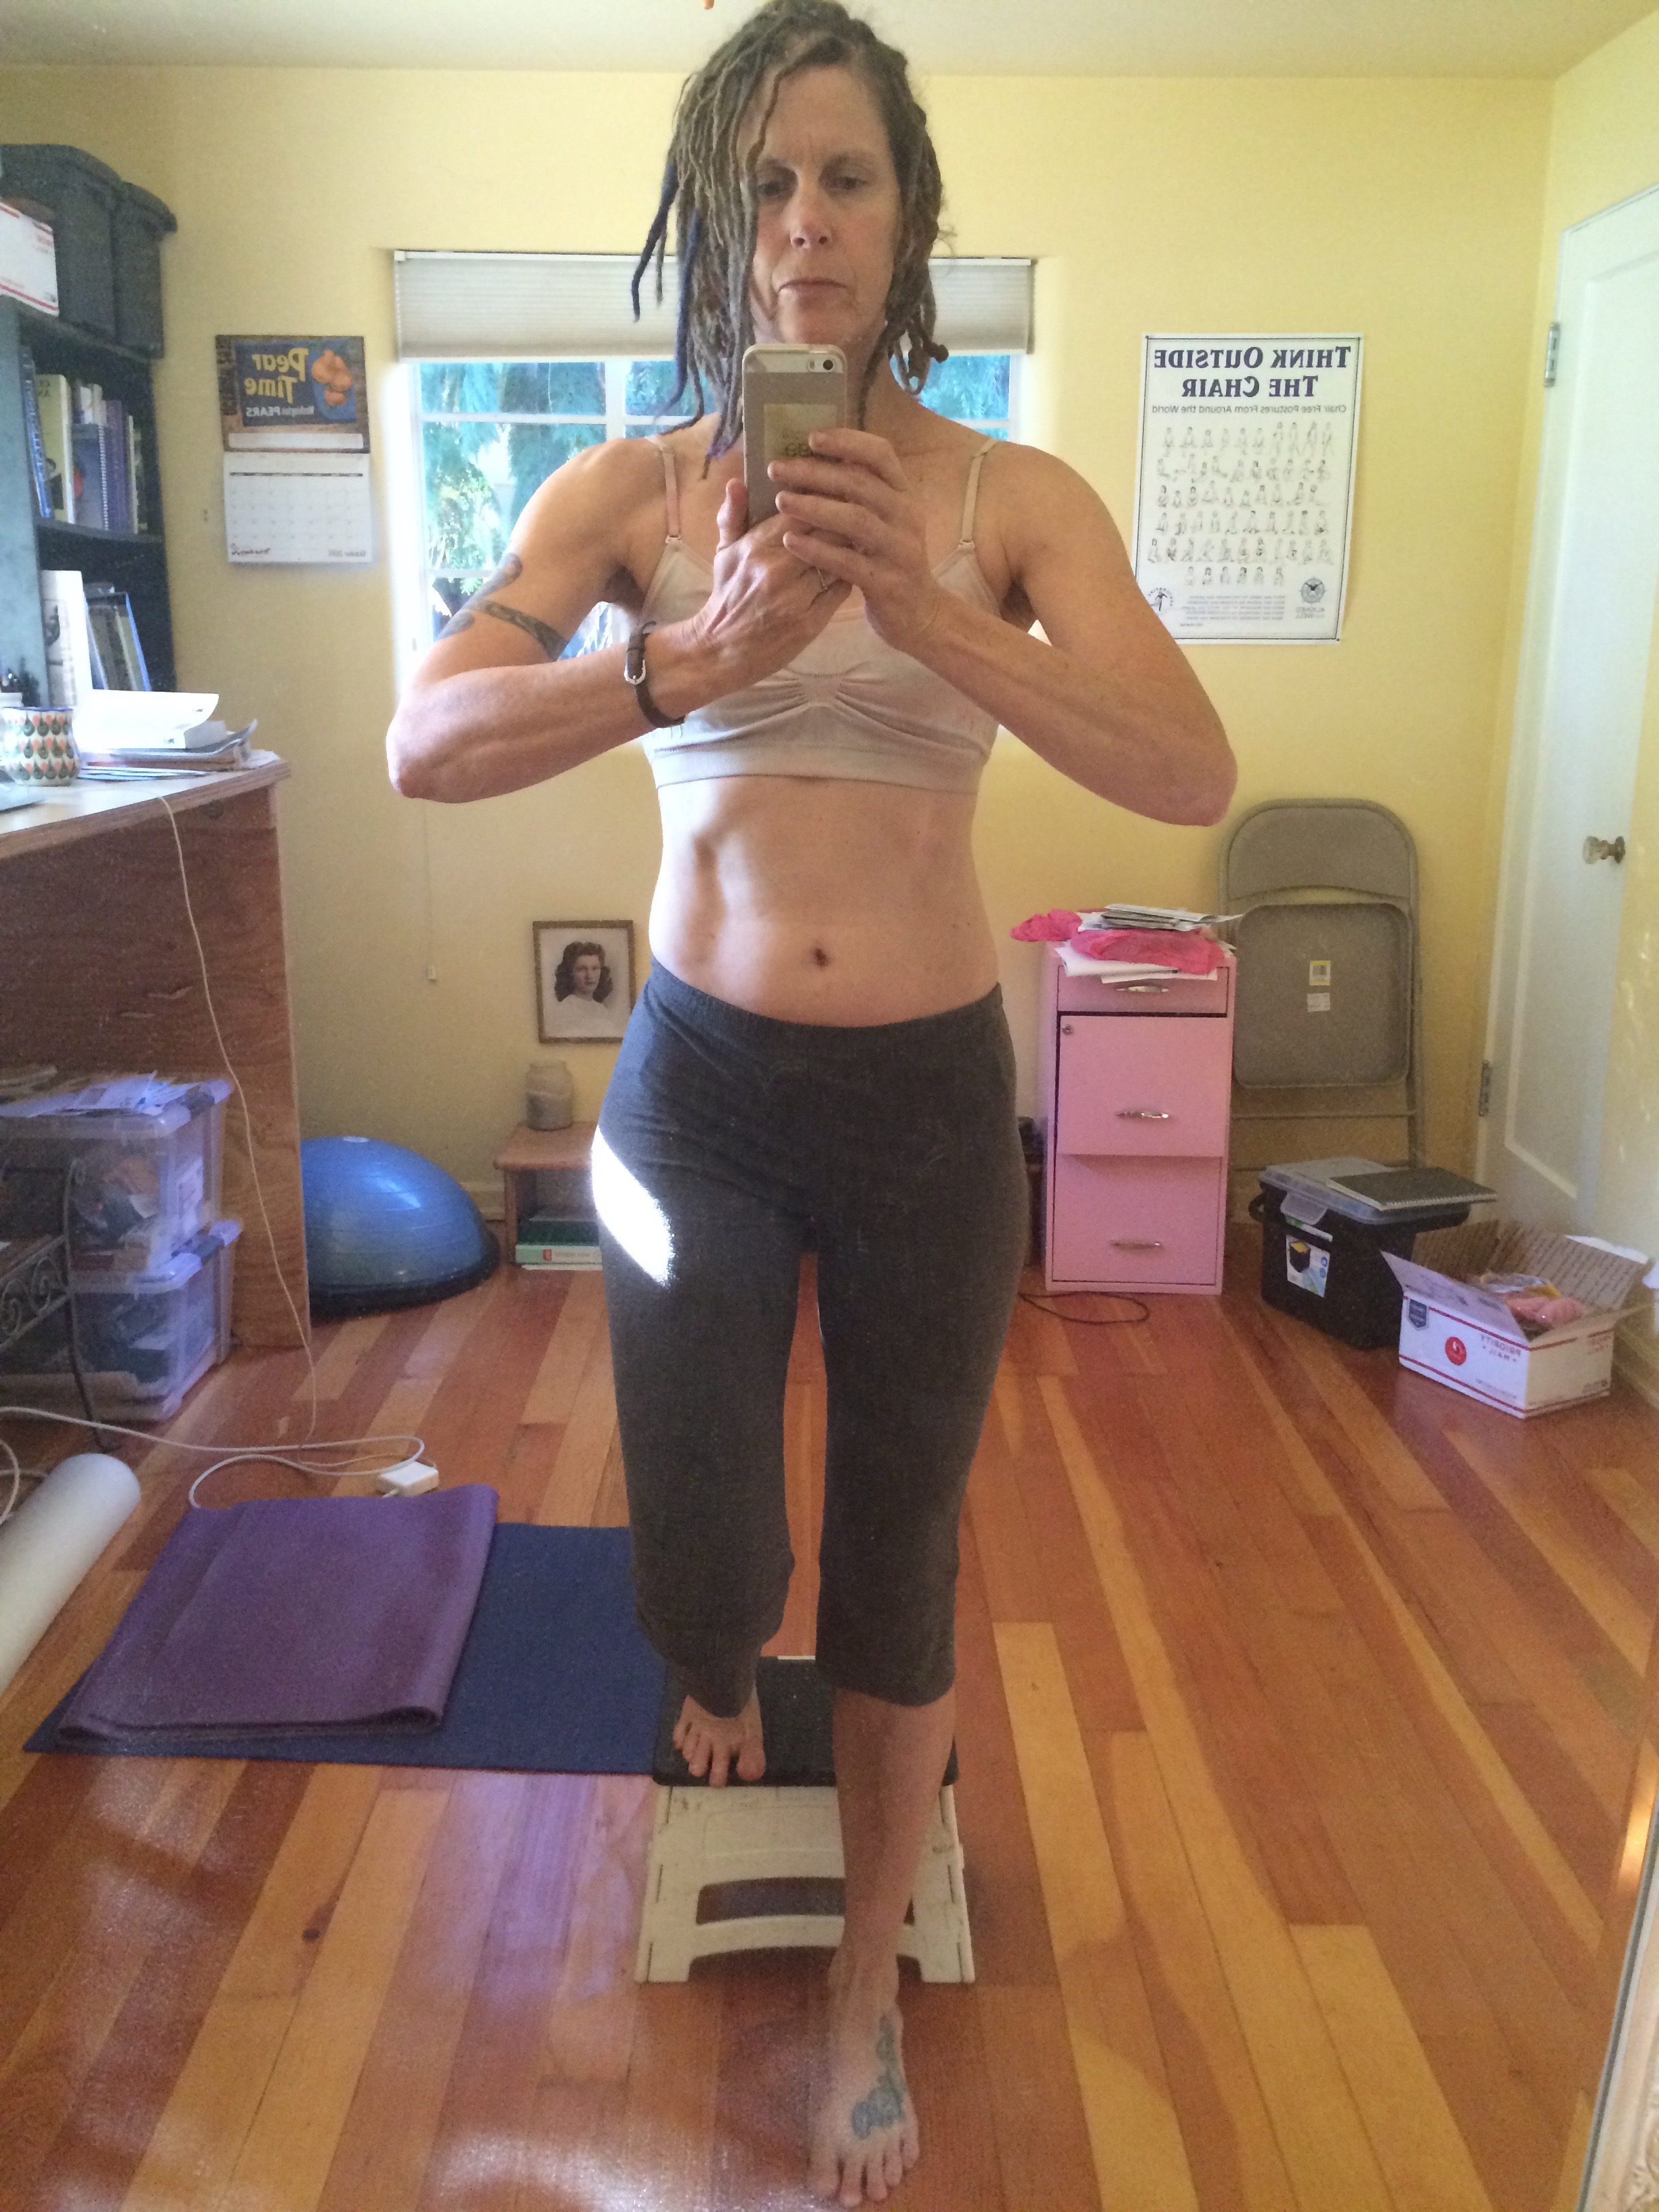
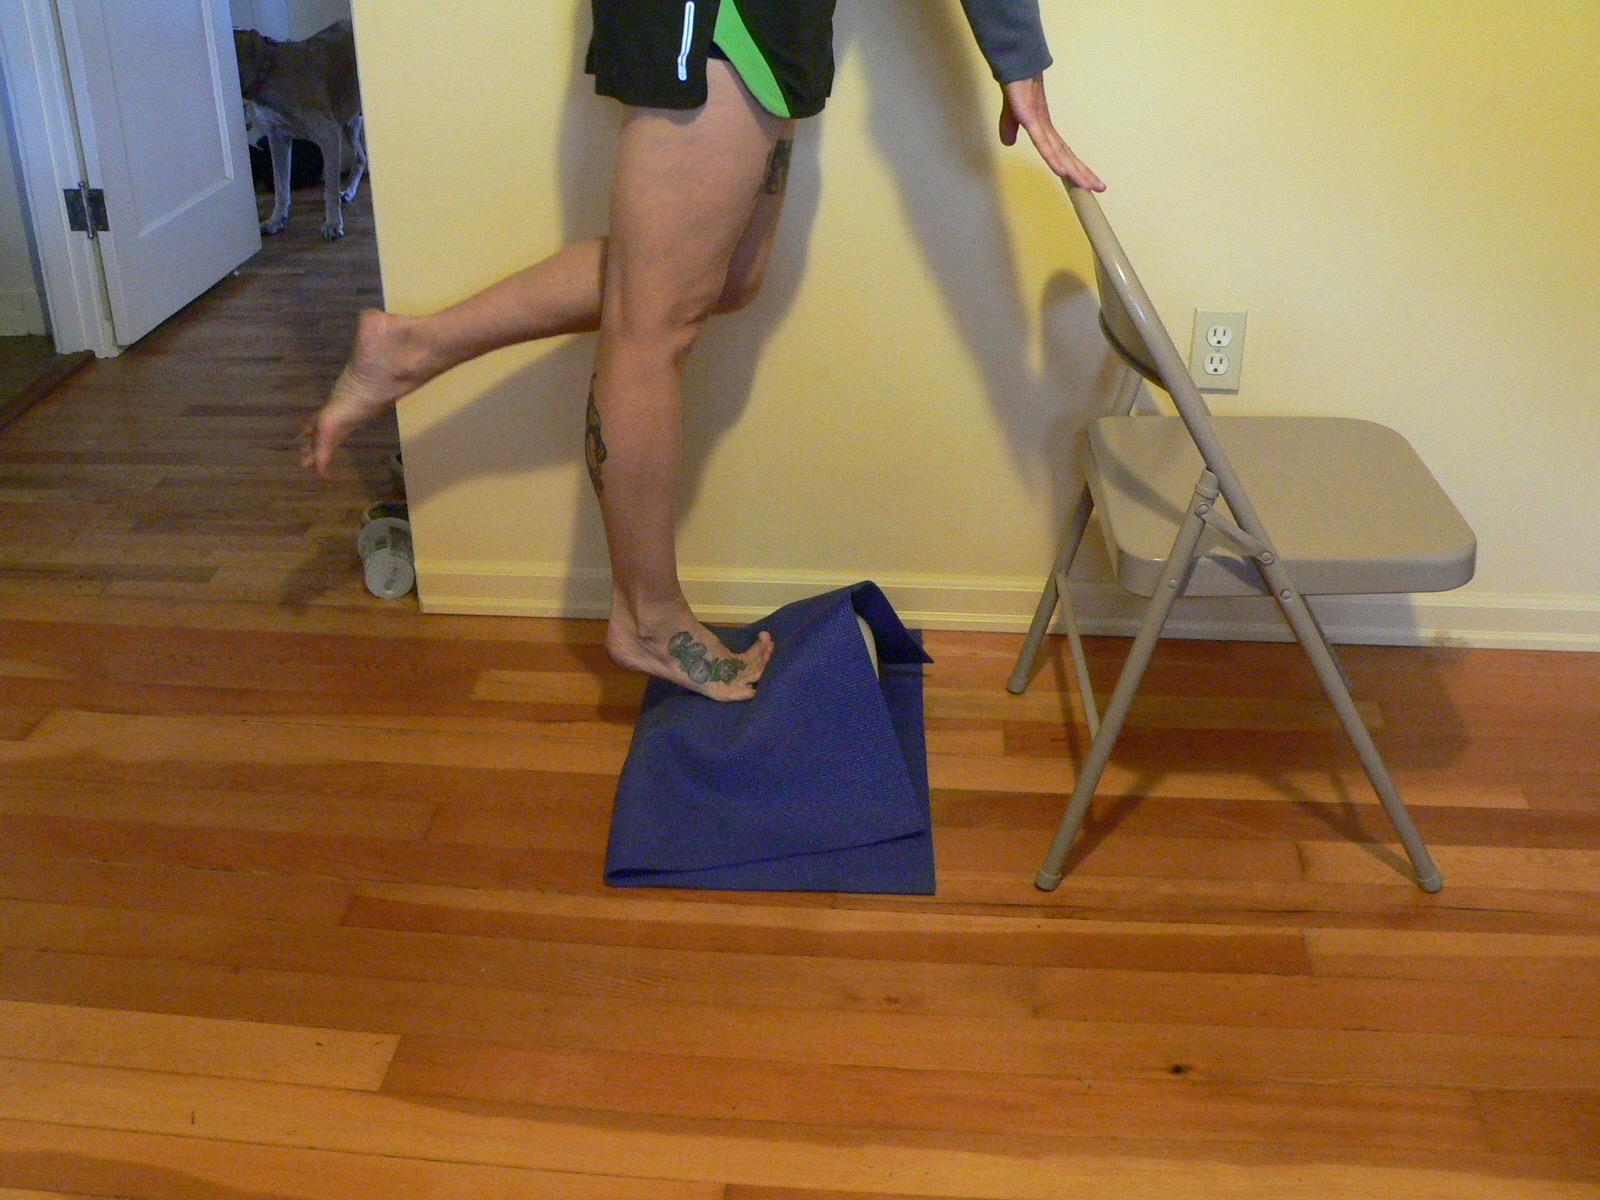
Uthitta Hasta Padangustasana (single leg balance)

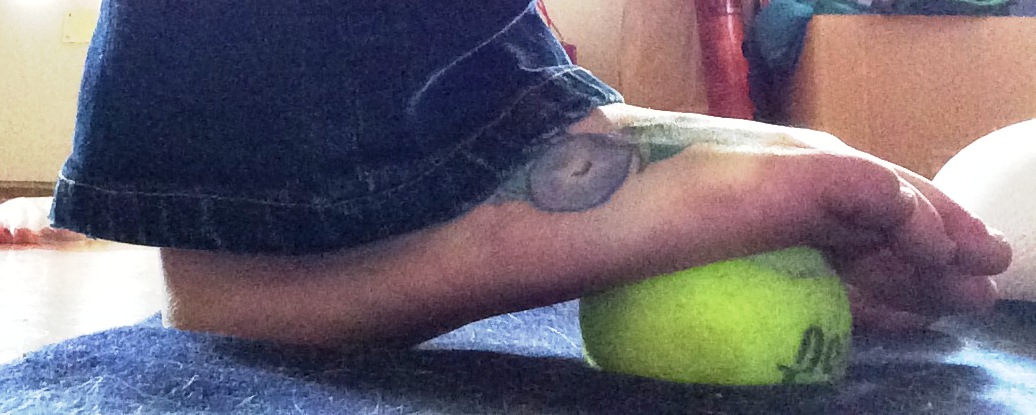
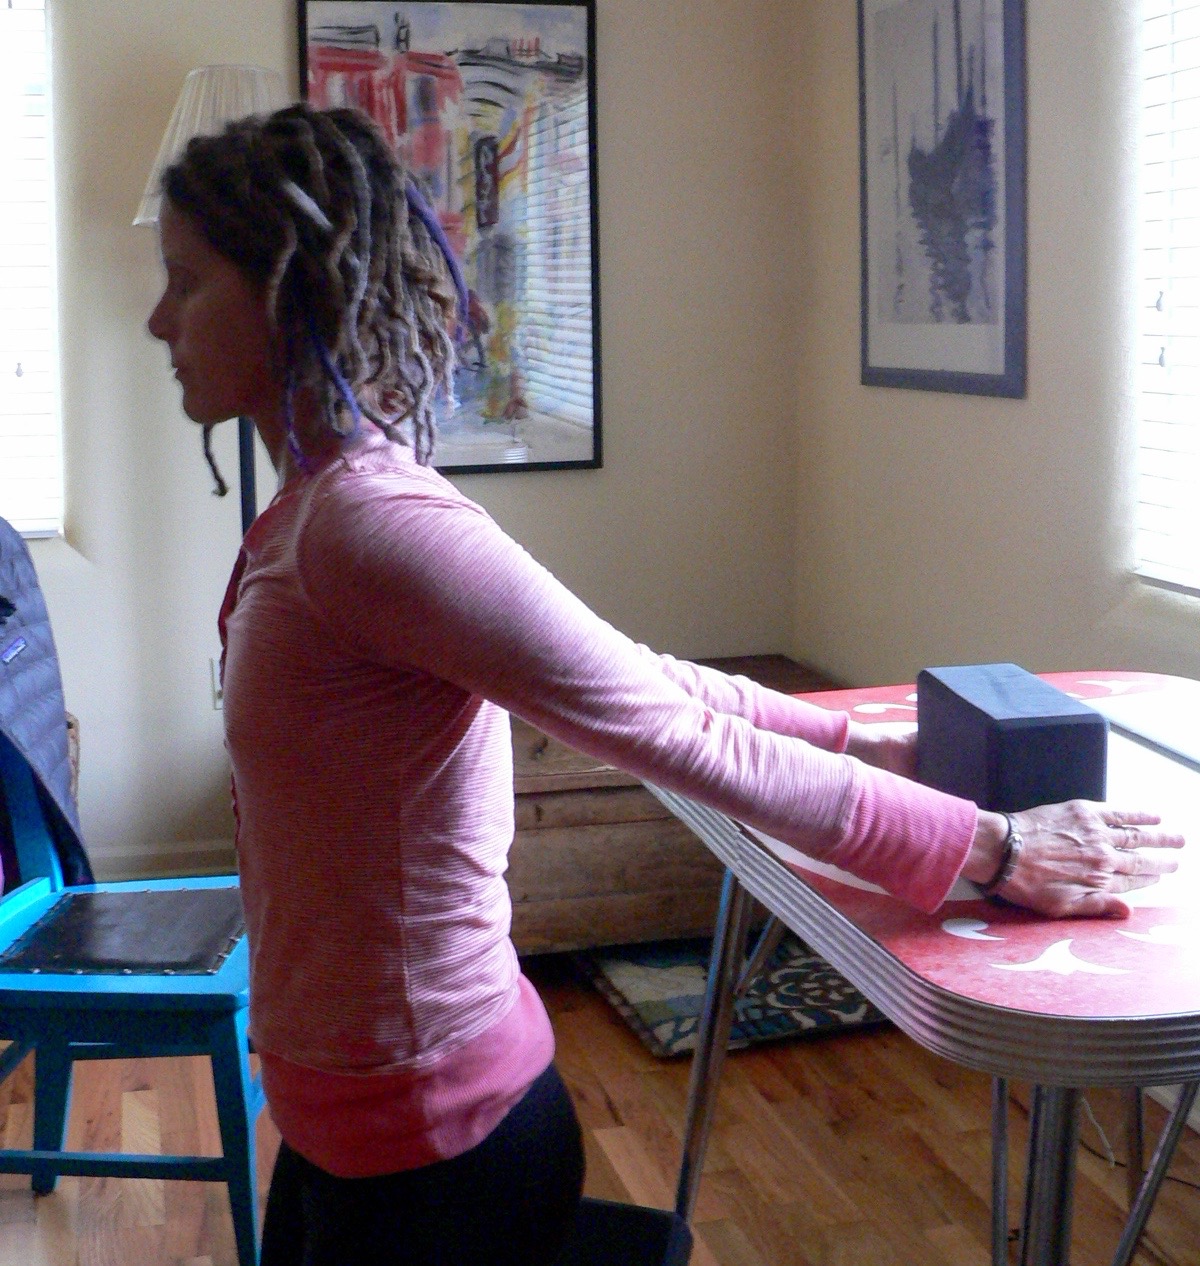
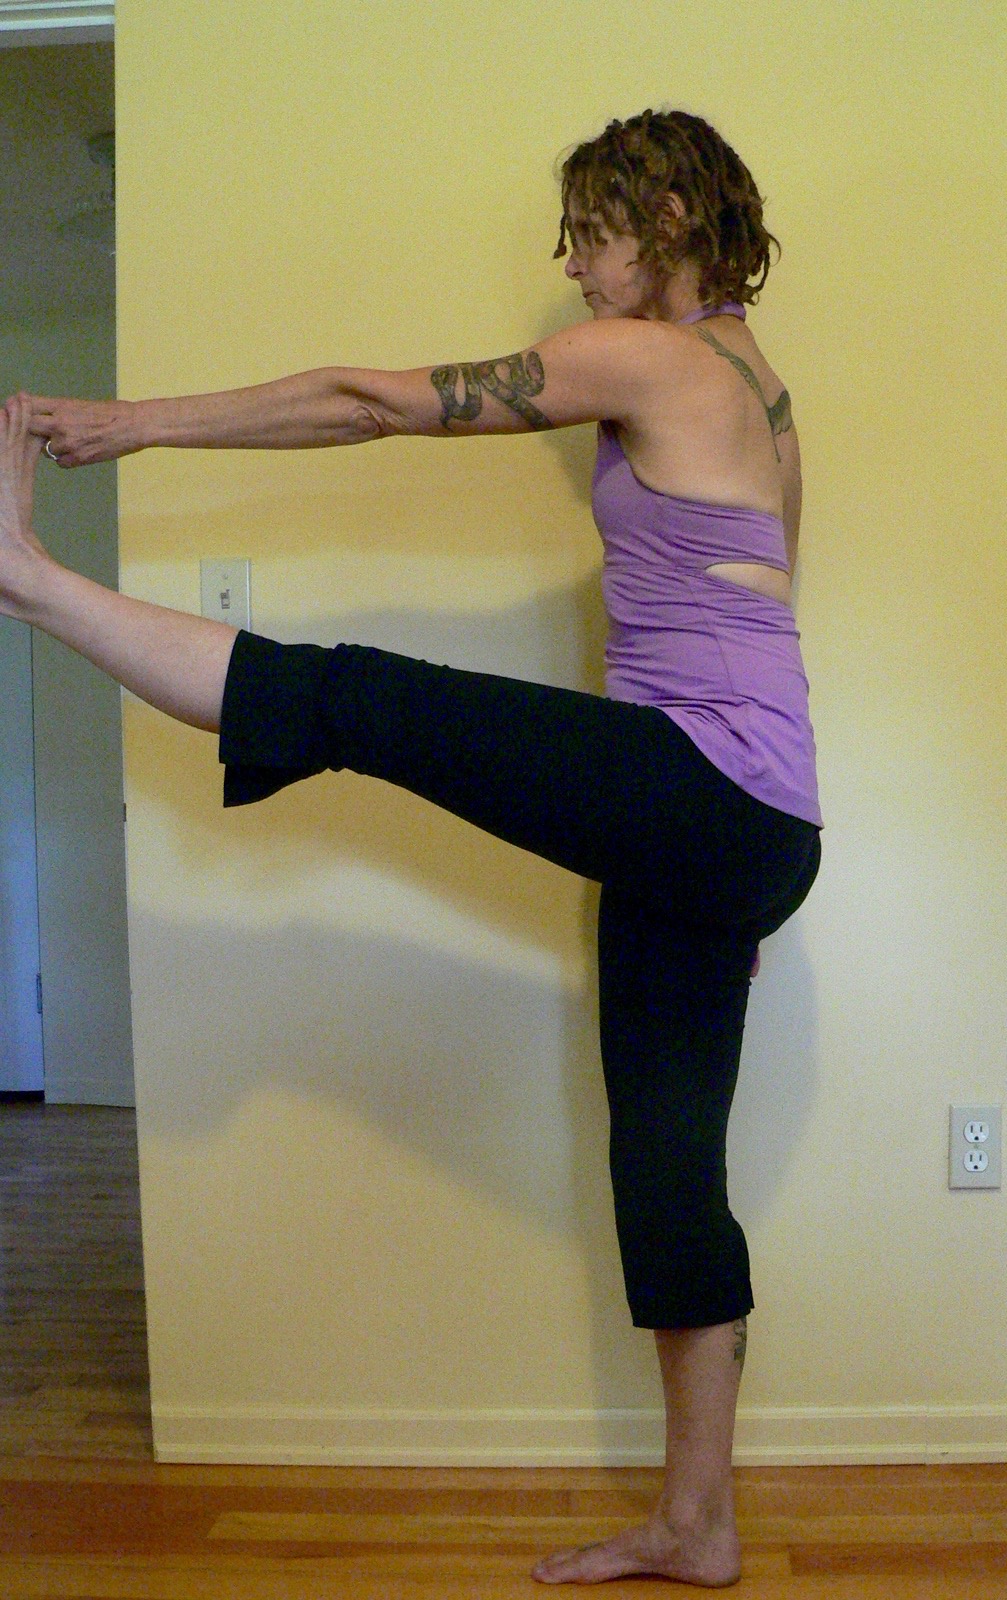
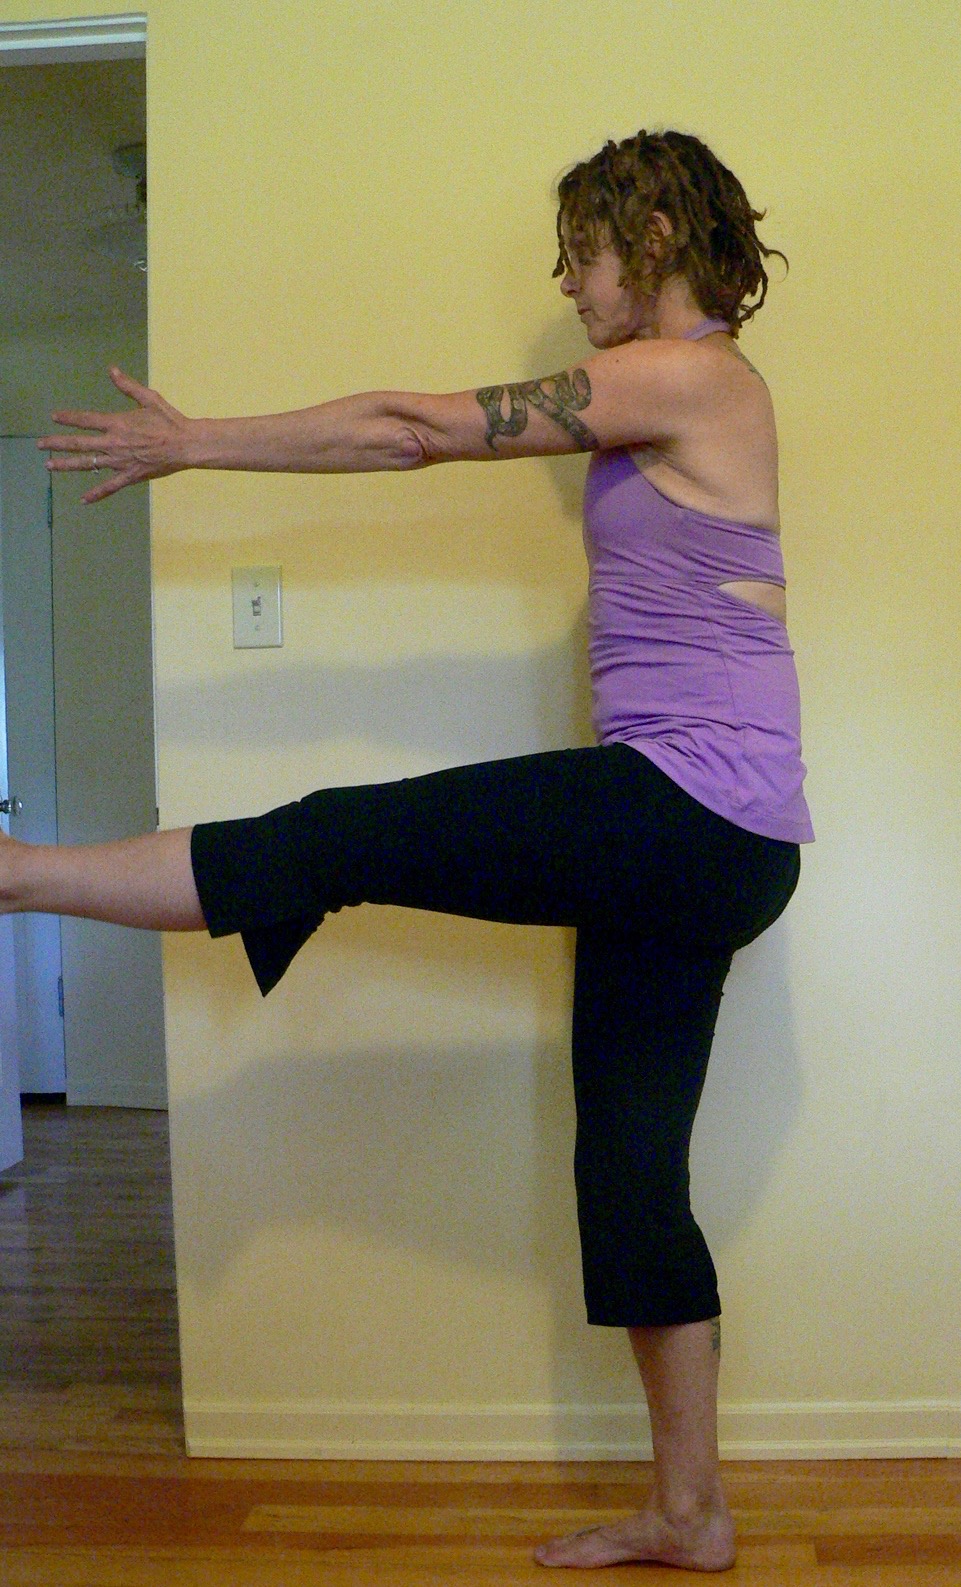
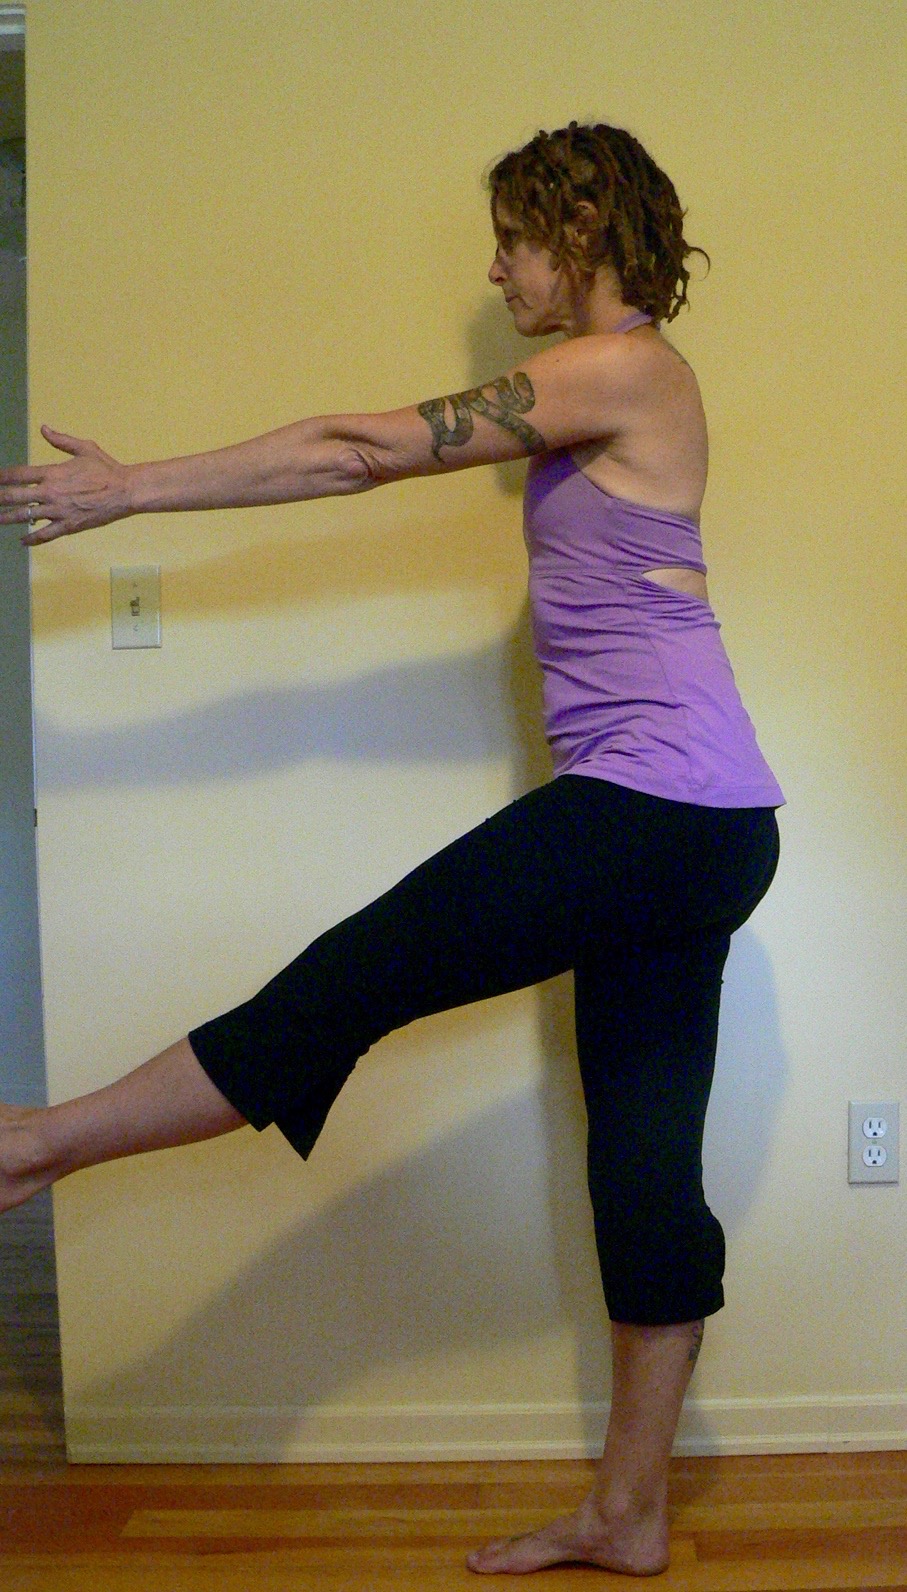
Follow this key, when visualizing the beginner, intermediate, and advanced variations of padangustasana. Here is a visual.

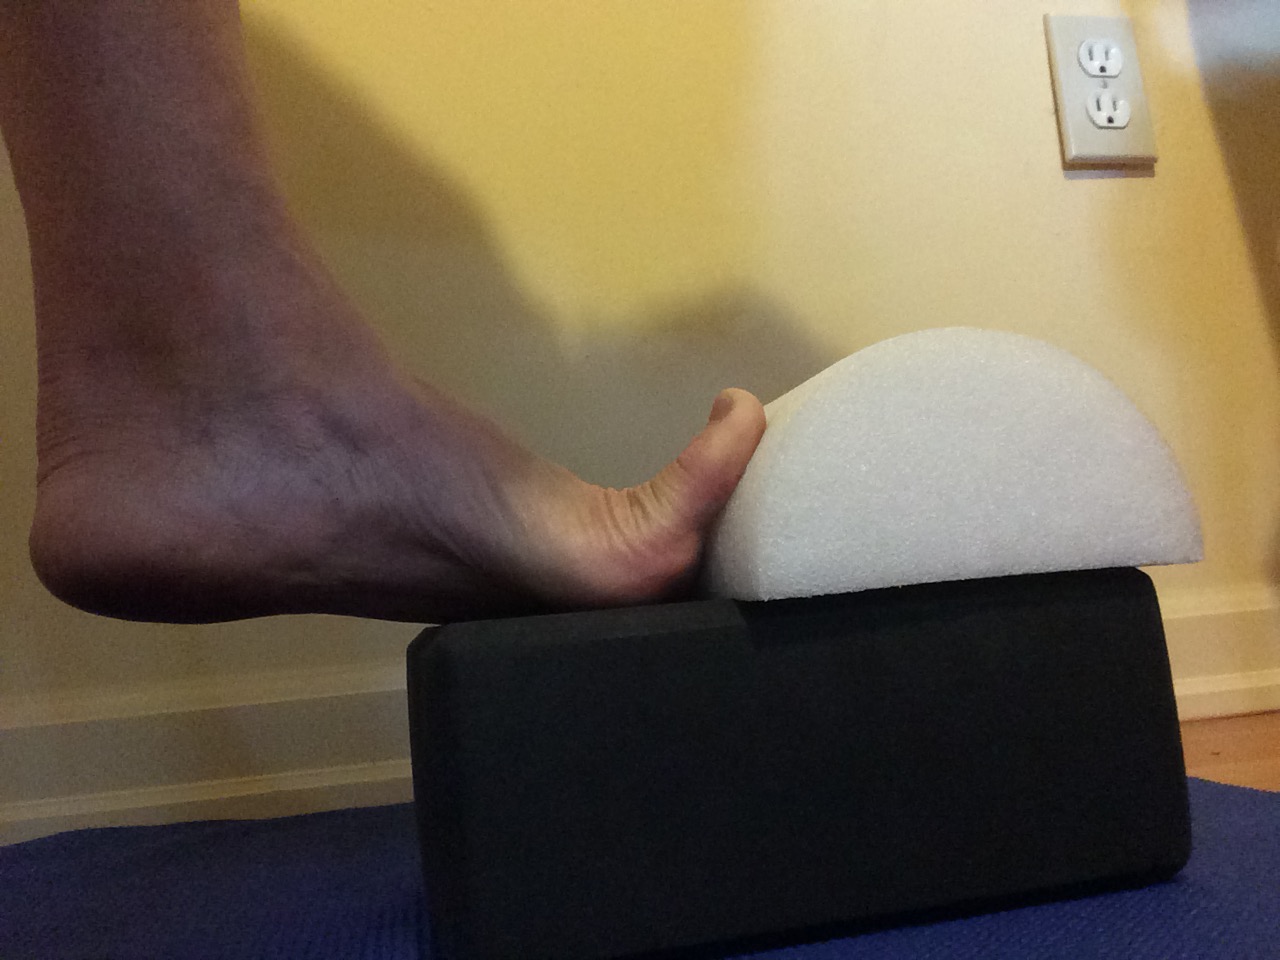
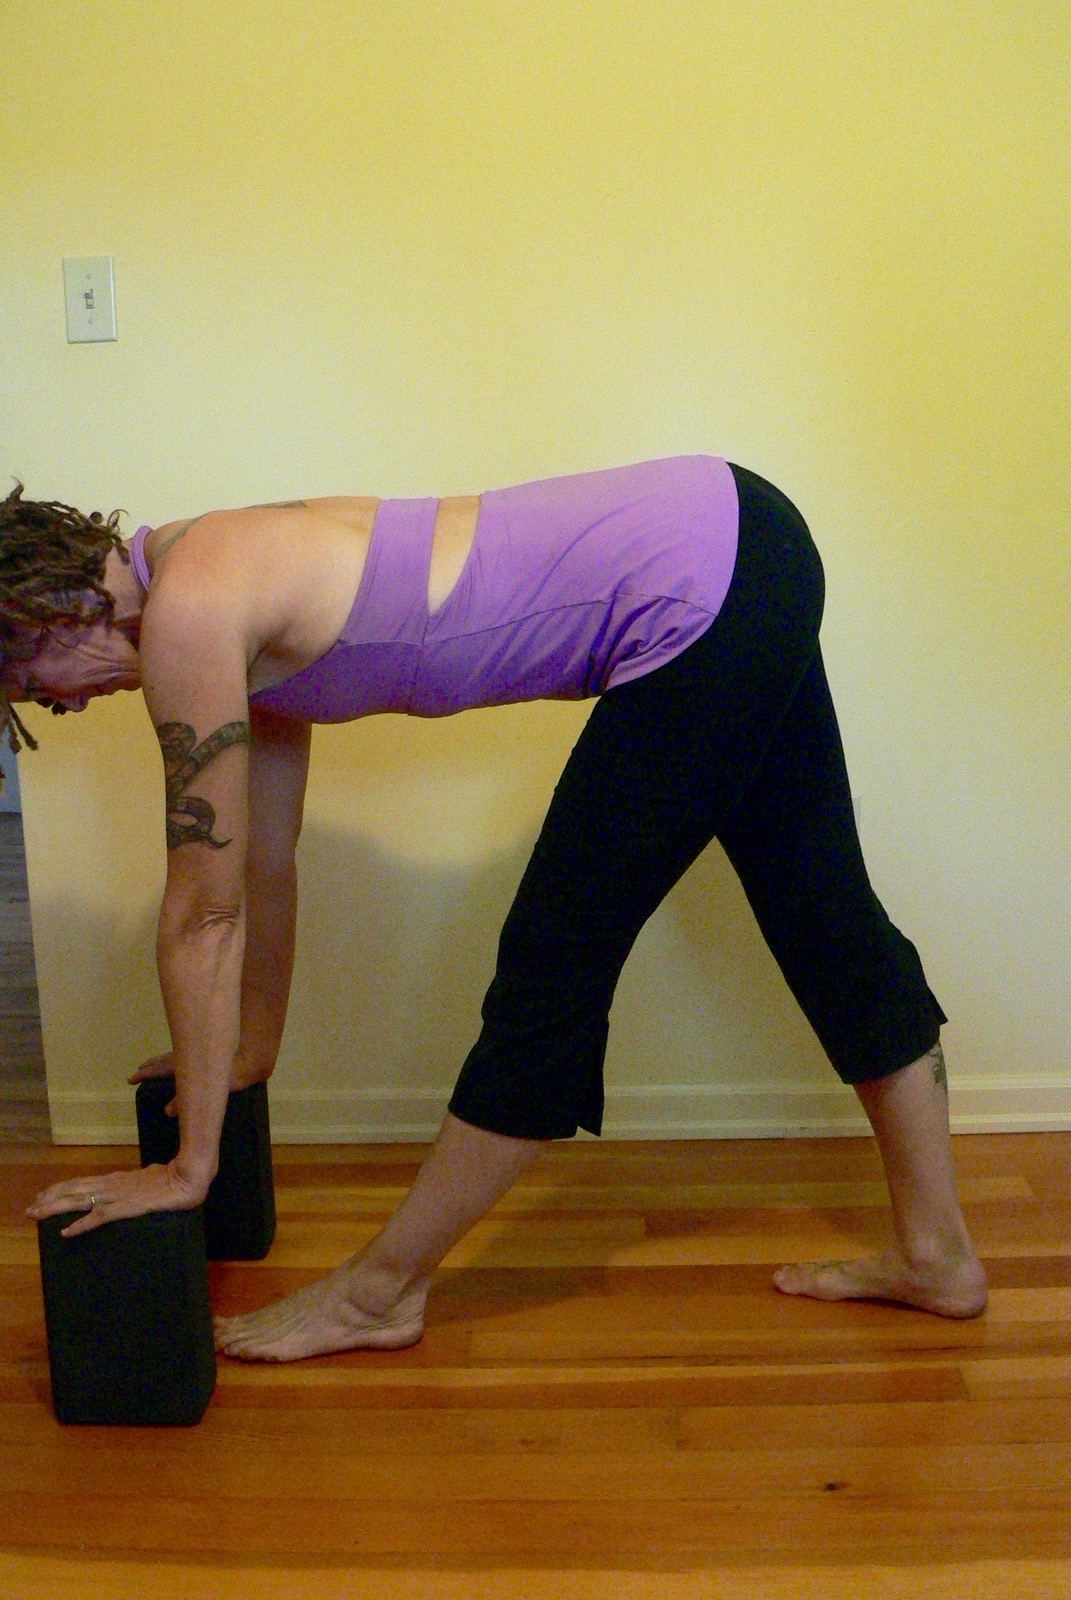
  • beginner = extended leg supported on blocks
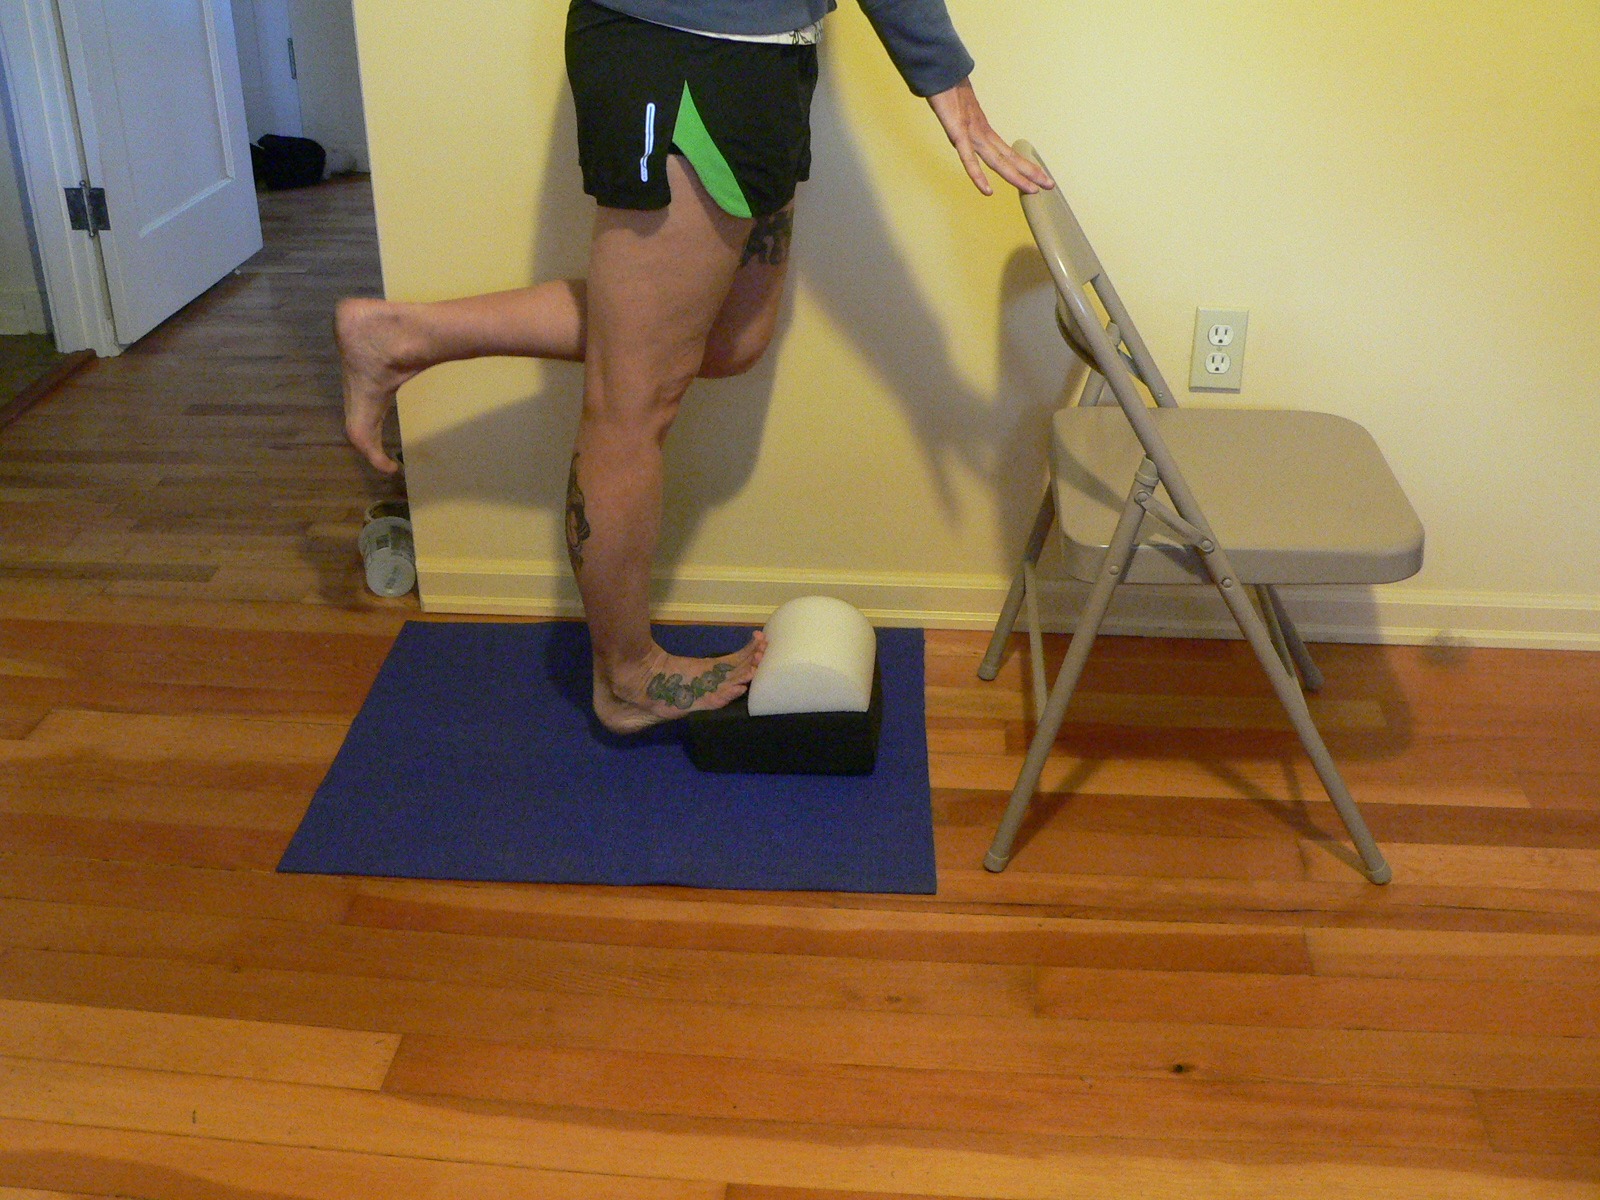
  • intermediate = extended leg supported on chair
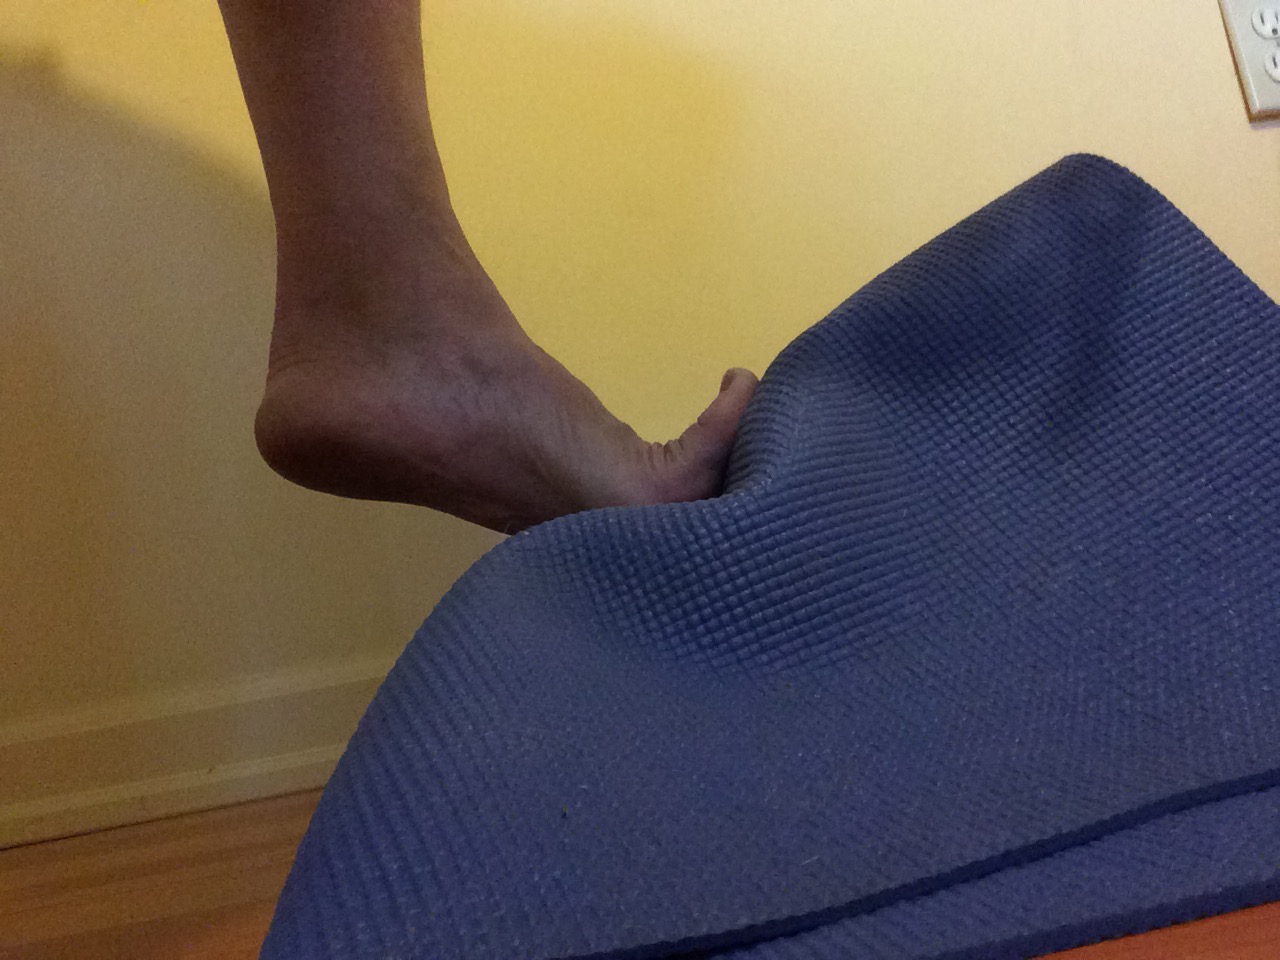
  • advanced = extended leg unsupported aka supported by the strength of the student

Progressing with Props…maybe not

Again, researchers were surprised, when their hypotheses were not supported. It turns out that extending your leg onto a chair is not much of a progression over stepping onto a stack of blocks, although it appears quite a bit more demanding. (I interject that there is likely more balance anxiety for some older students to place their leg on the higher chair.) The real progression comes with the advanced variation, which uses active mobility – you holding your own leg up. What is striking to me is that while the leg may be higher on the chair, the effort is larger in the advanced variation – even though the leg is barely off the ground (see link to visual) because the student is generating internal force (muscle force) rather than relying on external force (chair) to assume the posture. It matters how you get there. It matters how you stay there.

Hamstrings

In the advanced variation, co-contraction of the hamstrings and quadriceps occurs, stiffening the joint and increasing stability, however, this increased loading may exacerbate existing knee osteoarthritis symptoms.

Recommendation: For senior students with existing knee problems, suggest they stick with the beginner or intermediate variations of Vrksasana.

Ankles

This study found Padangustasana to be an excellent posture for improving plantar flexor (think rising up onto the ball of your feet) strength and performance, which is associated with balance and postural control, gait, and fall risk in older persons. However, it’s not until students are confidently performing this one legged balance that they appreciatively load the plantar flexor muscles.  This asana is also excellent for ankle inverter strength (think sole of the foot facing in towards the midline of your body), which, like strong plantar flexor muscles, is critical for balance but also in agility and walking proficiency.

Recommendation: encourage your appropriate older students to work towards the advanced variation o Uthitta Hasta Padangustasana for improving ankle strength and agility.

Conclusions

This study’s biomechanical insights provide evidence that can be used by yoga instructors, when selecting modifications for their older students.

Here are three points to remember:

  1. Posture variations that have long been considered introductory may actually induce higher demands at some joints and planes of motion, than pose variations considered advanced.
  2. Pose variations can produce forces that are in the opposite direction of those generated during the classical variation.
  3. Use of props, such as a wall, to reduce contraindicated joint loading may have little or no effect.

As a yoga and movement teacher, my biggest take away is that there are few well-designed studies in the area of biomechanical forces and yogasana. In fact, the authors’ state that this is the first study to quantify the physical demands of yoga pose variations, using biomechanical methodologies. I will continue to seek more research like this so that I can replace time-honored ideas about what I think or what I’ve been told might be happening in yoga with what is actually happening in yoga.

The Physical Demands of the Tree (Vriksasana) and One-Leg Balance (Utthita Hasta Padangusthasana) Poses Performed by Seniors: A Biomechanical Examination. Sean S.-Y. Yu,  Man-Ying Wang,  Sachithra Samarawickrame,  Rami Hashish,  Leslie Kazadi,  Gail A. Greendale, and George J. Salem. Evidence-Based Complementary and Alternative Medicine. 2012.  http://www.ncbi.nlm.nih.gov/pmc/articles/PMC3437689/

Namaste, Michele

Foot Love Workshop Exercises – October 2015

You can find variations of some of these exercises in world-renowned Biomechanist Katy Bowman’s books & DVD included in her Healthy Foot Kit.

Healthy_Foot_Kit-1

Standing Exercises

All standing exercises should be done in Tadasana aka mountain pose with your feet pelvis-width distance apart, pointing forward, which means the outside edges of your feet should form a straight line (you can line up the edge of one of your feet on a yoga mat to check that it is actually straight and match the other accordingly); and your hips back so that they are stacked over your knees, ankles, and heels and not drifting or thrusting forward. Keep your weight back in your heels. I call this Smart Tadasana Alignment.

Toe Spreading

Lift your toes (this is called extension), spread them away from each other, and place them down onto the mat. Repeat several times throughout your day. You can improve your ability to actively spread your toes by passively spreading them using toe socks.

Short Foot Exercise

A full explanation is linked, but the short of it is to draw the base of your big toe towards your heel, without flexing or curling your toes. It’s OK if they grip the floor. This action lifts your arch, thereby shortening the length of your foot, and strengthening the arch-supporting muscles. Hold for 5 seconds and repeat 3 times for each foot. Try to do 5 sets of 3 repetitions per day, holding for 5 seconds each rep. You can perform the short foot exercise any time your standing in yoga postures and as you get stronger, you can do it while balancing. The Short Foot Exercise is comparable to the Strong Yoga Foot.

Balancing

Any single leg balance will strengthen your extrinsic and intrinsic foot musculature. Once you are skilled at balancing on a firm surface, you can explore a variety of unique surfaces – a folded up towel or blanket, a yoga block, a half round, a boot tray of rocks, your yard…Hold for up to one minute and repeat several times throughout your day.

Exploratory feet

Move your feet in exploratory, weird, random, bizarre, strange, silly, varied ways. This can be done sitting in Dandasana (with your legs extended in front of you) or lying down. This is a great way to mobilize your feet before you get out of bed in the morning. Repeat throughout your day.

Top of foot stretch

Extend a leg behind you, pressing the top of your foot into the mat. It is important to keep your pelvis back and stacked vertically over the knee & ankle of your front or support leg as the tendency is for it to drift forward. If balance is a challenge, please use a chair so that you can concentrate on the stretch without worrying about the balance.Hold for up to one minute. Repeat several times throughout your day.

Top of foot stretch

Top of foot stretch

Calf Elevator

Lift the heels of both feet, coming up onto your tippy toes. Try to avoid letting your ankles blow out to the sides. If they do, then only raise your heels as high as you can keep your ankles stable. Hold for several seconds. Once you are skilled at balancing on both feet, start working towards one foot at a time. You can do this either by lifting the heels of both feet, but letting the work happen mainly in one foot; or you could do this balancing on one foot! Whichever variation you choose, make sure your hips are back. Hold for up to one minute. Repeat several times throughout your day.

Calf stretch

A half round (or half moon as one of students sweetly miscalled it) is best for this stretch, but you could roll up a couple of yoga mats or blanket or use a book. Place the ball of your foot on the top of the half round with your heel on the ground. Keep your other foot even to and pelvic-width apart from the stretching calf. You can advance in this pose by slowly stepping the non-stretching foot forward. If your pelvis moves forward with you or you lose balance or get rigid, bring the forward stepping foot back and don’t progress until you can do so in a relaxed and balanced stance with your hips back. Hold for up to one minute. Repeat several times throughout your day.

I purchased a SPRI Half Round Foam Roller, 36 x 6-Inch that I cut down to one 18″ length and three 6″ lengths that I use for various purposes as yoga props.

Calf Stretch/Elevator Combination

Stand with one foot on the half-round and elevate both heels to a slow count of three. Hold for 3 counts. Lower for a slow count of three. The lowering is where you train eccentrically, generating force while you are lengthening your muscle tendon units. This is how you get stronger at greater ranges and with more control. At the place that you want to give up and drop your heel is the opportunity to exercise muscle control.

Hamstring stretch

I’ll be posting later this week on hamstring stretching, but for now, start from tadasana, place your hands on your thighs and hinge forward at your hip joints, allowing your hands to slide down your legs, keeping your spine in neutral. As soon as your spine starts to deform ie round, stop, come up a few inches and work instead on lifting your tailbone, which will move the proximal muscle attachments for your hamstrings that are located on your sitting bones away from the distal attachments that are located on your lower legs, thus stretching these muscles. Hold for up to one minute. Repeat several times throughout your day.

Ball rolling massage

Place a new, firm tennis ball on a yoga mat or carpet. Keep your heel down as you drape only your toes over the ball, weighting it as much as you can tolerate. Very, very slowly, roll the ball under your toes, from side to side, allowing your toes to spread as you go. After a while move your foot forward so that the ball of your foot drapes across the ball. Again, move very slowly side to side. Continue to move your foot forward in small sections using a side to side motion. When you are deep into the arch of your foot, you might explore some front to back motions, or invert/evert your foot to get into the lateral and medial arches. The benefit from this massage comes when you slow down, take your time, move forward in tiny increments, hang out in sore spots, and remember to breathe. This can and should be done daily as a meditation practice.

staticball3

Floor Exercises

Plantar Fascia Stretch – kneeling/squatting

In this exercise, you kneel with your knees pelvis-width apart on a mat or padded surface. Extend (curl) your toes forward. If you can, reach around and separate your toes from each other and make sure they are all extending forward. You may be able to lower your hips, shifting more of your weight onto your feet, but do this slowly and with ease as the thick band of fascia and four layers of intrinsic muscles on the soles of your feet may never have experienced this type of stretch. Images and detailed instructions are linked above.

Barbie foot

This is the exercise where you press your balls forward (of your feet, people!), all toes forward, all toes back, foot back. You know the one. In the balls forward, toes back position, your feet look like Barbie’s. You can use your arms to support you in an upright seated position, but I suggest you place your hands in your lap from time to time and hold yourself up using your own trunk musculature. Images and detailed instructions are linked above.

Bridge with marble

I know you all remember this bit of love from the workshop – a yoga bridge pose holding a marble with your toes and extending your leg. Yes, that one.  Remember, cramping is good…a good reminder, that it, that you should be moving your feet more. Again, images and detailed instructions are linked above.

Ankle circles, point/flex, invert, evert

This can be done seated with legs extended or on your back. My preference is supine with legs extended 90 degrees and soles of your feet facing the ceiling. Try to keep your legs straight and pelvis-width apart and don’t be in such a hurry. Slow, sweeping circles will assure full range of motion. If you fatigue, bend your knees, but keep moving your ankles & feet.

Exploratory feet

Exploratory feet can be done standing in Tadasana with your feet squirming around on the mat; seated in a chair with them wiggling about on a bolster; seated on the floor with them playing mischievously out in front of you; or lying supine, my favorite, with your feet in the air spazzing all over. The object is to make as many movements as you can. According to my teacher Katy Bowman, a biomechanist and math dork, if you apply a mathematical concept called a factorial, a foot with 33 joints can deform into 8,600,000,000,000, 000, 000, 000, 000, 000, 000, 000, 000 unique ways – or thereabouts. Whatever.

Toe spreaders

These exercises will help to undo the harm that shoes with small toe boxes cause to the muscles between your toes that have so little range of motion or strength that you may not even be able to generate enough of your own force to spread your toes. The third exercise, Toe Lifts, was not included in the workshop because a) I forgot; or b) We ran out of time. Whatever.

Namaste, Michele

Welcome to your shoulder girdle – shoulder extension

Q. When I extend my arms, called shoulder extension in yoga, with a strap looped around my hands (or just hands clasped), I have significantly more range of motion than when I do the same action but holding a block. What is the difference?

These are the kinds of questions that I ponder at 3:30 am, when I should be sleeping. I don’t have enough tacit knowledge (yet) to answer such questions, so I get out my anatomy books and play, trying to puzzle it out. It is in this way that I’ve layered functional, contextual understanding on top of fuzzy recollections and ineffectual memorization. As always, what is happening is way more complex than my summation, but you’ll get the drift.

What are the similarities?

Let’s first look at the similarities. In both examples of shoulder extension, the primary movers or agonists – being the posterior deltoids and triceps – are contracting with help from latissimus dorsi aka lats, while the anterior deltoids, pectoralis major aka pecs and biceps are stretching.

And now the differences.

shoulder_extension_strap

In the strap example, because my hands have to push outward against the strap to keep it taut, my arms are therefore attempting to abduct or move away from my body, which means my lateral deltoids are also contracting. Were the strap removed, continuing to abduct my arms would eventually bring them into the arm position of Virabhadrasana 2. The loads are different, but the result would look about the same if I were clasping my hands instead of using a strap.

shoulder_extension_block2

In the block example, because my hands have to push into the block to keep if from falling to the floor, my arms are thus adducting or moving towards my body, meaning my lats and pecs are also contracting. By contracting my chest muscles, I effectively put the break on further extension of my arms behind me because I am now co-contracting muscles that both cause and keep me from extending. And that is why I cannot lift my arms as high with the block. 

Which method is better?

Is one method – strap or block – better than the other? It depends…

If you want to increase strength and integrity of your tendons, which is my goal in yoga, the bock technique is better for two reasons:

Co-contracting provides greater resistance for the primary movers – posterior deltoids and triceps. I don’t need to tell you this as you can experience it yourself, when you attempt to extend further.

  • the technique I use is to place a block behind me with elbows extended (straight), press firmly into the block (~75% of maximum effort) and try to lift it higher – just like in the picture above.

Adding  an isometric contraction at end range of motion signals collagen production in your tendons thus increasing their stiffness and their capacity to withstand greater loads. Relax already, stiffness as a biomechanical concept is not the same as that feeling of “tight” or “stiff” often exclaimed in yoga; tendon stiffness is a desirable thing. This kind of muscular work in yoga will make your tendons and ligaments more resilient against injury and ultimately may improve your flexibility.

  • One technique I use is to place a block behind me with elbows extended, and barely holding the block, lift my arms until I hit my end range and then press my hands firmly (~75% of maximum effort) into the block, holding for 10 seconds. This technique differs from what I described previously in that I lift my arms first  and press the block second; whereas previously, I pressed first and lifted second. It makes a difference how you get there. 
  • Another technique would be to press the block down onto a counter/table which is essentially trying to move into shoulder flexion and will fire the stretching anterior deltoid. At the same time, press your hands into the block (adduct) to isometrically contract your pectoralis major. It’s a lot of work!

shoulder_extension_blocktable

  • And yet another technique would be to clasp your hands and push them into a block positioned against your sacrum – here you get concentric work in the posterior deltoids, triceps, and lats as well as isometric contraction in your anterior deltoids while they are stretching at what may or may not be your end range. It doesn’t matter – you want to be be able to generate force at all ranges of motion.

shoulder_extension_block3

Think of this work in shoulder extension as prep work for puvottonasana aka reverse table top/plank. Ray Long, whom I introduce in an earlier post, is a master at knowing what muscles are working in just about any yoga pose you can think of. Once you know which muscles are contracting and which are stretching in a pose, you can manipulate variables to increase active mobility. He cues to isometrically attempt to scrub or drag the hands towards the hips, but without actually moving them. This simulates shoulder flexion,  and just like in the examples above using the table or the block against the sacrum, it causes an isometric contraction in the muscles that are stretching, and that makes them strong, more resilient at that range of motion. You can read more here in his book Yoga Mat Companion 3: Anatomy for Backbends and Twists.
Try it.

purvottonasana_RL

Purvottonasana by Ray Long

Or, you could just go back to passively flopping your arms overhead, which may increase your flexibility, but won’t increase strength and resiliency of your tissues. I like to think of passive, yummy poses as junk food yoga, a nod to Katy Bowman’s junk food walking. It’s really yummy and pleasurable, but should only be consumed in small amounts, not that often, and never in place of nutritious, connective tissue loving active mobility.

shoulder_extension_yummy

Namaste, Michele

Oh My Knee (OMK!) and lateral hip strength

I’ve been studying knee biomechanics for an epic upcoming series of posts on knees and yoga. I’ve had over 25 years of knee pain and will be blogging about my dumb knees, what finally nearly fixed them, what set me back from this fix, and how to apply yoga and Restorative Exercise™. Thomas Michaud, who wrote THE book on human locomotion – Human Locomotion: The Conservative Management of Gait Related Disorders, provides in another of his books, Injury-Free Running: How to Build Strength, Improve Form, and Treat/Prevent Injuries, an eye opening test for lateral hip strength, which is the domain of the abductors – gluteals and tensor fascia lata. The test is called the Forward Step-down Test.

I photographed and videotaped (see my FB page) myself doing this test. In the images, I used an 8″ stool instead of a 4″ box to step down from, because that is what I had at the moment and I am impatient. **Later, I stacked yoga blocks on a book to make a 4″ box, which is the customary height for the test. The results were about the same, albeit less dramatic on the 4″ box. Otherwise, I tried to replicate his assessment.

Ideally, when I step off the box, my non-stepping hip should not displace laterally (to the side). The more it displaces, the weaker are my abductors.  My abductors should be firing (eccentrically contracting) to stabilize my hip joint, keeping movement in the sagittal plane since I am moving sagittally or forward. Notice the difference in displacement of my right hip (second image) as compared to my left. What is interesting is that I can and do make a point of firing my lateral hip muscles in yoga, especially in single leg balancing postures, and I regularly do the “pelvic list,” an exercise I learned from my teacher Katy Bowman (warning if you don’t like toddlers, don’t watch this video).  All of this work balancing while intentionally firing my lateral hip muscles in yoga and active mobility training via the pelvic list has made me strong and good at balancing in yoga and pelvic listing. But, it has not translated into coordinated, timely recruitment of my lateral hip muscles during this particular movement – stepping down.

ForwardstepdownLforwardstepdown1R

Who cares? Well, besides my hips, my knees care. Not only do my hips take a beating each time I go down stairs or downhill, hip weakness is the most likely cause for patellofemoral pain syndrome. It turns out that this pain may not be due to an unstable patella that is not tracking correctly, thus moving  sideways, as has been thought for years by sports scientists and clinicians, but it is likely due to the outer aspect of the femur moving into a stable patella because of weak abductors. Whoa!

Here is the lesson. “The inability of strengthening exercises to alter movement emphasizes an important point…you can’t just make a muscle stronger, you have to retrain the muscle to interact in synchrony with other muscles.” Dr. Thomas Michaud

I want to protect my hip and knee joints by functionally improving my lateral hip strength. I’ll continue conditioning these muscles through active yogasana balancing and pelvic listing, but I’ll also be devising a plan to train my hips for the hugely important and frequently occuring movement pattern for which they are currently offline – stepping down. By varying frequency, rate, direction, location, and any other force characteristics of stepping down that I can manipulate, I will train my hips not just for stepping down from a 4″ box but for stepping down in a multitude of situations. Like life. I’m going for variation in my stepping down –  from varying heights, from unstable objects,  from varying surfaces, by controlling different joint angles, etc. If you get in my way, I will step down from you. Or maybe onto you.

Namaste, Michele

FootLove Yoga’s Online Offerings!

I’ve added Online Classes to the menu with links to video shorts of me demonstrating how to use yogasana and other movement exercises to:

  • Improve strength to weight ratio – see if you are strong enough to hold/move your own weight
  • Train active mobility – add eccentric, isometric, and concentric action to yogasana, which is actually how you get more flexible, if that is your goal
  • Stay within your boundaries – learn your functional end ranges of motion, how to get there, and how to get stronger there

Also, you can use the Online Classes menu item to get to $5 Alignment Snacks. I often get asked how I learned what I teach. I read and train a lot, but those who most inform my current yoga teaching are highlighted in this post. I trained and certified in Restorative Exercise™ under Katy Bowman. You can learn straight from Katy with these killer 30 – 60 minute exercise videos, called Alignment Snacks, that you download, own, and view as often as you like for only $5 each! This is a fantastic deal.

Load Your Feet to Improve Plantar Fasciitis

Last month, I wrote about dissonance that occurs, when I perceive discord among yoga teachers and other movement thinkers, whose work I follow. As a yoga teacher, former research librarian, soon to be Restorative Exercise Specialist™, and someone with rebellious tendencies, I am wired to ask a lot of questions about what is being taught in yoga – and why – and whether cues were informed by research or lineage. Often this results in mental compromises (and annoyed teachers & colleagues) as I try to reconcile such teachings with each other and with what I experience in my body or with my students and clients. There comes a time when a clarifying convergence of ideas emerges that confirms I am on the right path and following teachings from which I am meant to learn. This is one of those occasions. 

In previous posts (listed below), I discussed plantar fasciitis (aka plantar fasciosis) and biomechanical and environmental factors that can be addressed conservatively through yogasana, plantar fascia-specific stretching, alignment, and conditioning.

Previous posts on plantar fasciitis and exercises that can help:

https://footloveyoga.com/2015/01/05/plantar-fasciitis-what-we-know-what-we-can-do-about-it-january-5-2015/

https://footloveyoga.com/2015/01/08/what-does-plantar-fasciitis-your-down-comforter-and-your-sleep-position-have-in-common/

https://footloveyoga.com/2015/01/17/simulating-the-toe-off-event-in-walking-to-stretch-your-plantar-fascia/

https://footloveyoga.com/2015/01/13/strong-yoga-foot/

https://footloveyoga.com/2015/03/16/the-strong-yoga-foot-and-your-flat-feet-in-research/

Upon returning yesterday from what has come to be known as the Jules Mitchell Portland Tour, I found the September 1, 2015 issue of my partner’s American Family Physician peer-reviewed journal sitting on my desk with a section circled. The article was titled “Top 20 Research Studies of 2014 for Primary Care Physicians.” Basically, a group of clinicians with expertise in evidenced-based medicine performed monthly surveillance on 110 clinical research journals in 2014 (the 20th year they have been doing such surveillance). They identified 255 studies that had potential to change how family physicians practice, and narrowed that group down to 20 studies with relevance to primary care practice, validity, and likelihood that they could change practice. The section circled for my benefit was from one of these 20 studies titled “High-load strength training improves outcome in patients with plantar fasciitis: A randomized controlled trial with 12-month follow-up,” which addressed the question of whether strength training is more effective than stretching for patients with plantar fasciitis. The bottom line answer was YES. “A regimen of strength training improves pain and function in patients with plantar fasciitis faster than a typical stretching regimen. Over time, though, patients who stretch will continue to improve and have similar improvement.” My take home, after reading the full study, is that high-load strength training, at 3 months out, resulted in quicker reduction in pain and improvement in function, when compared to stretching alone. However, 3 months was the magic time period. Before three months and at 6  and 12 months, strength training was not superior to stretching.

So, how does this research study on plantar fasciitis converge with the Jules Mitchell Portland Tour? Jules is one of the teachers in my dissonance piece. She is a biomechanist and yogi, who wrote her masters thesis on the science of stretching and turned the world of yoga on its head. One of her workshops that I attended this weekend was an impressive attempt to distill  3 years of research on the biomechanics and neuromechanisms of stretching into 8 hours of yoga workshop. The piece that is relevant here, further distilled from 3 years of research to 8 hours of workshop to two minutes of interpretive writing, is that loading connective tissues, which happens in active static stretching and isometric and eccentric training, is how we get stronger, healthier connective tissues. It is all about the load. You must input load. It is so much more complicated and nuanced than that…I challenge you to learn more by reading Jules’ seminal post on tissue mechanics, which begins her blogging journey of her thesis work.

In explaining results of the plantar fascia study, the authors confirm Jules’ findings that large tensile forces (loads) are associated with improvements in symptoms in conditions involving degenerative changes, like plantar fasciosis. Since the plantar fascia is composed of type 1 collagen fibers, it responds to high loads by laying down more collagen, which may help improve the condition. An additional benefit of high-load strength training is increased ankle dorsiflexion strength, as decreased ankle dorsiflexion strength has previously been identified in those with plantar fasciosis.

Applied exercises in your home yoga practice

With a little creativity, you can use yoga props to combine ankle dorsiflexion and controlled loading of the plantar fascia. This exercise can be used by those with or without plantar fasciosis, as it trains active mobility and improves strength at end ranges of motion in your feet and ankles, which is good for everyone. We know that strong, flexible feet are healthy, happy, and mobile.

I use a block, half round, and yoga mat. You can use a stair step or low stool in place of a yoga block and a rolled up towel or yoga mat for the half round/mat combo in the images below.

The first two pictures show my naked set-up, but I actually cover the whole contraption with a yoga mat because the half-round slides on the block without the mat, when I start doing the exercise. You probably won’t get slippage if you are using a towel instead of a half-round.

plantar fasciosis load1 plantarfasciosisload2 plantarfasciosisload3

  1. Place the toes of your right foot on the mat-wrapped half-round (towel), so that they are maximally dorsal flexed, meaning your toes extend back towards you.
  2. Place the ball of your foot on the block (stool or step).
  3. Hold onto a chair/rail for balance and slowly, over a period of 3 seconds, lift your right heel, so that you rise up onto the ball of your foot (concentric phase).
  4. Remain in the raised position for 2 seconds (isometric phase).
  5. Slowly lower your heel, over a period of 3 seconds, to slightly below the level of the block (eccentric phase). The rise, hold, & lower is one rep.
  6. Repeat up to 12 times (reps) for up to 3 sets.
  7. Once you can do 3 sets of 12 reps, play around with increasing the load by wearing a loaded backpack. You might decrease the number of reps at this new load, but increase the number of sets. The idea here is to progressively load the tissues as you get stronger.
  8. Perform this exercise every other day.
  9. If you find you are not strong enough to do unilateral heel raises, try using both feet at the same time until you are stronger.
  10. This protocol is just a suggestion. Modify the load, reps, sets, and props, customizing it to suit your strength, flexibility, and movement history.

plantarfasciosis load5 plantarfasciosis load4

P.S. Look at how in the first picture, both ankles are dorsal flexed; and in the second both are plantar flexed. Not intentional. Just a neural pathway, I guess.

Consider adding this exercise to your foot health protocol of stretching, strengthening, and mobilizing your feet.

Namaste, Michele

Strong At Any Length

I write today about paradigmatic shifts in yogasana – an evolution in three acts – inspired by three teachers, whose work I’ve been deeply studying and with whom I’ve been privileged to train in vivo. Having multiple teachers is an exercise in blessings and curses and maddening dissonance. I am constantly reconciling and reconvening the experts in my head. I call a summit of this brain trust at least once a week, usually on Facebook, where I am then schooled by my smart(er) colleagues and their respective adepts. This is a mashup of what I’ve come to understand from these bodysmarties and how I’ve integrated their wizardry into my movement and life practices.

Act One by Ray Long: The Bandha Yoga Codex: Using Reciprocal Inhibition, Muscle Isolations, Co-Activations, and Facilitated Stretches in Yogasana

I have devoured Ray Long’s books and had the great fortune of a weekend workshop with him in Vancouver. It was through his teachings that anatomy ceased being abstract, non-contextual, and tedious rote memorization. His beautifully rendered books brought anatomy to life through methodical application of stretching physiology to yogasana.  His MO is to define the position of joints in a pose, identify prime mover muscles (agonists) and their corresponding stretchers (antagonists), and use stretch reflexes – muscle spindle, reciprocal inhibition, and golgi tendon organ to facilitate muscle extension. Where I find him most masterful is in cuing how to isometrically contract a muscle using directional cues like “press the hand onto the floor to contract serratus anterior” or “the cue for engaging these muscle together is to press the sole of the back foot into the floor and [isometrically] drag it toward the back side of the mat.” I wish all yoga teachers cuing isometric contractions would read Ray’s books and learn clear, sensible instructions instead of what can sometimes come across as vague, mystifying directives.  After learning of Jules Mitchell’s work, I started using Ray’s cues for muscle contraction not to facilitate reciprocal inhibition (ie contracting the quadriceps to further stretch the hamstrings), but instead I use his money cues to isometrically contract the stretching muscle, thereby increasing strength at the end range of motion, which, it turns out, is what actually increases flexibility.

I have read and recommend the following books by Ray Long.

The Key Muscles of Yoga: Scientific Keys, Volume I

The Key Poses of Yoga: Scientific Keys, Volume II

Yoga Mat Companion 1: Anatomy for Vinyasa Flow and Standing Poses

Yoga Mat Companion 2: Anatomy for Hip Openers and Forward Bends

Yoga Mat Companion 3: Anatomy for Backbends and Twists

Yoga Mat Companion 4: Anatomy for Arm Balances and Inversions

Act Two by Katy Bowman: Neutral Pelvis: How I Learned to Stop Using My Back to Stretch My Hip and Other Lessons in Honoring My Boundaries.

I’ve already written my primer on Katy Bowman on this blog. Most relevant here is Katy’s brilliant teachings on forces, loads, visible and invisible boundaries, and errant joint motions. Let me try to explain. In yoga, your body is subject to various forces, but of primary importance is how you position your joints in relation to each other. These forces are experienced as loads on your tissues. Regardless of the yoga lineage or alignment system you follow, your alignment markers are tools for helping you establish and maintain visible boundaries in your postures. Consider reverse warrior pose. If you maintain 90 degrees of flexion in your front knee as you laterally flex your spine, you will receive a different stretch than if you lose some of that flexion in your knee as you move into the pose. Try it. Circumventing your visible boundaries, as in the reverse warrior example, will not get you what you want in the pose – in this case, a stretch in the lateral trunk muscles.

When you disregard or have no visible boundaries (alignment markers) you are probably not stretching what you think you are. If alignment points (for example “90 degree flexion in knee in reverse warrior” or “shoulders stacked over wrists in cat/cow”) are your visible boundaries, what, then, are invisible boundaries? They are hidden forces, like errant joint positions, that undermine your alignment. Take the pelvis. In Katy’s system of Restorative Exercise, a neutral pelvis is one, where the  pelvic bones and pubic bone are in the same plane perpendicular to the floor. These visible boundaries (alignment markers), when honored, assure that you are stretching your hip flexors vs. overextending your back. Try this simple test. In a standing position, put your pelvis in neutral (Katy’s post linked to above gives a great visual). Remain upright (don’t fold forward into a Vira 3 variation), extend a leg behind you as far as you can. Notice that in order to get the leg that far back, your pelvis had to tilt forward and you contracted the muscles in your lower back. You used your back to stretch your hip flexors. Now try it again, this time keep your pelvis neutral while you extend your leg. This movement was much smaller and did not involve your back at all. This is your true range of motion in your hip flexing muscles. You can apply this same concept to prone postures like Dhanurasana (bow) or Salabhasana (locust). There is nothing wrong with involving your back, if you are aware that you are doing it and desire the accompanying lumbar extension and compression. If, however, you compress your spine each time that you only meant to extend your hip, then you are using your back to do the work of the muscles that should be stretching your hip.

Act Three by Jules Mitchell: Strong at Any Length: A Yogi Turned Biomechanist Turned Yoga Stretching on its Head

I have a nerdy girl crush on biomechanist Jules Mitchell. Me and about a gazillion other yoginis. The crush is strictly science based. I am a former research librarian, whose idea of a good time is to sit at home on Friday night with a stack of research papers. Jules wrote her masters thesis on the science of stretching and she turned the world of yoga on its head (not to be confused with the king is dead kind of headstand). She slogged through hundreds of research articles trying to confirm what she thought she knew about yoga stretching – that it makes muscles longer. What she discovered is that increases in range of motion are not biomechanical, but neuromechanical – yoga doesn’t lengthen muscles, it merely increases your nervous system’s tolerance to stretch further.  This is a ridiculously oversimplified explanation of Jules’ epic, paradigm shifting, game changing, head exploding thesis. But you are in luck, because she blogged about her research along the way and you can read about it. Start with her seminal post on tissue mechanics. If you want a concise distillation of Jules’ conclusions, read Jenni Rawlings’ post Stretching is in Your Brain – another smartypants to whom I am most grateful.

Two ways that Jules applies what she learned about the relationship between strength and flexibility inform my own practice. I was introduced to the idea of training active range of motion initially by Katy Bowman.

  1. Train active range of motion
  2. Strengthen at your end ranges of motion via muscle contraction

Training active range of motion in yoga simply means that you use muscle control to get into and out of a posture. If you have to leverage one body part with another or use your hands to lift your foot/leg into position, you are “placing” yourself into a position that you are not strong/flexible enough to get into organically. When you do this, you bypass your neurology and the tax for that “deeper” pose is that you no longer provide optimal muscular stability to your joints and you are in danger of stretching your connective tissues to permanent deformation or failure.  It is when you are in an active range of motion that you increase strength and flexibility.

For instance, in the seated spinal twist ardha matsyendrasana, instead of leveraging your elbow against your knee to twist your torso, you could simply use the core musculature of your trunk to twist. Try this,  keep your hands on your shoulders and twist using only your core muscles. If you need a hand on the floor behind you for support, make sure you are not leveraging the twist further with that hand.  Notice how far you are able to twist. This is your active range of motion. Now place your opposite elbow to the outside of your knee and leverage to see how much further you can twist. The difference is your passive range of motion. At best, in passive range of motion, you are not getting stronger or more flexible. At worst, you have rotated into a range of motion that is not safe for you because you bypassed the brake signal your nervous system gave you in the active twist. It is your brain that stops you from twisting further – not short or tight muscles. This concept applies whenever you are twisting, but expecially think about losing the leverage in postures like parivrtta utkatasana (revolved chair) and parivrtta trikonasana (revolved triangle).

Here are a few more postures to try that exemplify the brilliant work of Ray Long, Katy Bowman, & Jules Mitchell.

Vrksasana – I  used my hands to pick up my foot and place it high up onto my inner thigh.

P1030104 (1)

In this second version of tree pose, I used the strength and range of motion of my hip and leg to place my foot on my thigh without using my hand and while maintaining Tadasana (no cheating my foot up by contorting my body in some other manner). You see, my brain stopped me from going further because foot high on the thigh is not a position that I ever got into on my own before beginning to train active mobility. The first time I tried placing my foot without using my hand, I couldn’t get my heel higher than my knee joint! I am living evidence that training in active mobility improves both strength and flexibility.

vrksasana_active

And how about the Bikram or Hot Yoga variation? A striking difference between passive and active range of motion. Not only does passive range of motion  make your shorter, it sometimes changes the color of your clothes. Just kidding.

Vrksasana_bik_passivevrksasana_bik_active

Utthita Hasta Padangustasana takes on a whole new look, when you don’t use your hand to bypass your neurology.

UHP_passiveUHP_active_xn2UHP_active_np

In the classic pose, first picture, I am in passive range of motion – I used my hand to lift my foot, much higher than I could get it there on my own. My lumbar curvature is AWOL and if I had a dog tail, it would be between my legs.

Notice in the second picture, that even though I used active range of motion to lift my leg, I am not wearing a neutral pelvis. By retroverting my pelvis (tucking my tail), thus thrusting my pubic symphysis further forward than my pelvic bones (anterior superior iliac spines) and unwittingly flexing my standing knee,  I am now using my back to do the work of my leg – in this case flexing my hip.

The third picture shows the most optimal posture, in that I am training active range of motion and keeping a neutral pelvis (you can tell by the bubbleness of my bottom and my lordodic lumbar curve), but look how low high my leg is now!??!

Parsvattonasana

And finally, I hack Ray Long’s excellent cuing and mash it up with Jules Mitchell’s love of eccentric, concentric, and isometric muscle action for strengthening at end range in one of my favorite asanas – parsvottonasana. In this pose, the front leg’s hamstring is eccentrically contracting (generating force while lengthening). Cue lifting the front heel, while keeping the knee straight, to contract the calf muscle. You have just added a concentric contraction (generated force) to a stretching muscle.  Try slowly lifting and lowering the heel a few times. Next, with just the slightest bend of your knee, firmly press the heel of the front foot into the floor and isometrically  “drag” the front foot towards the back foot (don’t actually move the foot). Because the heel is fixed in place, this action of trying to press the heel into the floor and play drag it backwards is the same muscular action that would be taken if you were trying to flex your knee and results in a contraction of your stretching hamstring – the exact recipe for increasing strength at your end range of motion.

I would be honored and humbled to receive critical comments from any of these teachers or anyone familiar with their work. Or anyone, really.

Namaste, Michele

Sweat is 99% Water, 1% Natural Stuff and 0% Toxins

Yoga claims many health benefits, most of which are anecdotal, the collected stories and somatic truths of its millions of practitioners.   A few claims  are solidly supported by research – like improvements in pain, reduction in inflammation, enhanced body awareness, and those work horses of yoga – better strength and flexibility. Yoga’s promising effect on other diseases and conditions, like cancer, diabetes, and heart disease, are seeing a greater number of quality studies. But one thing for certain is that releasing toxins through sweating or twisting asanas is pure myth.

What is Sweat?

Sweat is 99% water with a dash of essential salt minerals, urea and other wastes from protein metabolism, and some trace elements like zinc. Sweat’s main job is thermoregulation – to cool the body. When your internal temperature rises, your sweat glands secrete a non-toxic mix of mostly water to your skin’s surface, where heat is removed by evaporation – aka sweat. When you sweat in yoga class, you are not releasing alcohol, angst, toxic chemicals, drugs, illness or supersized happybad meals – you are secreting mostly water for the physiological purpose of cooling your body. If you are hoping to rid yourself of the aforementioned toxic brew, rest assured that the actual parts of your body that do this work – your liver, kidneys, colon and mind – are actually doing this work. Unless…and this is a big unless, you have been occupationally exposed to high levels of heavy metals – arsenic, cadmium, lead, mercury, etc. A 2012 review that looked at 24 studies on toxicants and sweat, found levels of heavy metals in the sweat of subjects who had been occupationally or geochemically exposed. For the typical Western yoga practitioner, who has not had an occupational exposure, has not been exposed via geochemistry, and is not in kidney failure, the science has simply not shown sweat to be a major route for ridding the body of unwanted toxins.

Sweating is not a case of more is better. Excess sweating means elimination of water and its associated weight – aka water weight, which is not a true loss of fat or mass. In an ironic turn of events, heavy sweating is associated with a significant diminishment of urinary output, thus concentrating uric acid and other cellular wastes in your blood – the buildup of which is toxic to your body.

What About Wringing Toxins Out Your Organs?

I often hear yoga teachers refer to the detoxifying effects of spinal twists. While there may be a metaphorical truth to this claim, it’s more nuanced and complex than that. Whether you are flexing, extending, or twisting your core muscles, the act of generating force in a muscle causes the smallest of blood vessels (arterioles and capillaries) to vasodilate (get bigger), which pulls oxygen rich blood out of the arteries (lowering arterial blood pressure) and into these tiny vessels, feeding the work of your cells.  Your body’s waste removal system (lymphatic system) works in parallel with your cardiovascular system, thus while blood is being drawn into the muscles, cellular waste (toxins) is removed. This happens wherever and however you move your muscles and is not the territory of twists alone. Although a twist is an effective way to bring blood to your intervertebral discs, which do not have their own blood supply but rely on diffusion from the blood supply at their margins, flexing or extending your trunk may accomplish the same thing, as movement is thought to enhance the process of diffusion.

Now you see how using your muscles in yoga facilitates cellular waste removal and keeps your  spinal discs nourished, but what about wringing stale blood and toxins out of your organs to allow fresh blood in? Well, I lean on the wit of Kim & Mel at Smarterbodies to eviscerate this myth. “So twist and do so knowing that you are helping create movement in your internal organs, but in NO WAY are they “wrung out.”  That is not possible and if that happens to you or inside of you please go to a hospital, because you are going to die. Also, do the organs fill with fresh blood after a trunk rotation? No, they are CONSTANTLY filled with “fresh” (I’m assuming this means oxygenated) blood, because we have these vessels called ARTERIES whose job is to deliver this type of blood constantly from birth to death.”

As always, I am happy to elaborate on this or any previous content. Post your questions/comments here or email me at michele@footloveyoga.com.

Namaste, Michele

Q. But don’t I need to “do cardio” to stengthen my heart?

Actually, no, you don’t. You need to move more, and not at intense levels. Let me explain. Of all the wonderful, amazing things our bodies do, the most critical, the most imperative is to regenerate cells. 50-70 billion cells (which make up our tissues, which make up or organs, which make up our bodily systems, which make up us) die each day in the average adult human. Your body has the capacity to replace all of these cells. In fact, your life depends on you regenerating these cells. The recipe for cell regeneration is quite simple:

  • 1 part electricity (to move your cells)
  • 1 part blood (to feed your cells)
  • 1 part lymph (to remove cellular waste)

Mix together. Grow cells.

In baking, you can get all the ingredients right, but if you mix it wrong, you may end up with a culinary disaster. The same with  cellular regeneration. Mixing it correctly means moving all of your skeletal muscles as often as you can throughout your day. A combination of stretching, squatting, pulling/pushing your body weight with your arms, and walking comes closest to moving every skeletal muscle.  It is through muscle movement that blood is pulled from our arteries into our smallest of vessels bringing it to our cells (aka tissue food) and facilitating nerve health and cellular waste removal (you have to take out the garbage, bruh!).

So back to the heart. If cellular regeneration is our biological imperative, then you could consider your body a cell-making factory. Your heart and all 600+ skeletal muscles are its workers. If you are sedentary much of your day – sitting for breakfast, sitting for your drive to work, sitting at work, sitting for lunch, sitting for your drive home from work, sitting at dinner, and sitting in front of the TV/computer/book in the evening, and the only time you really get moving is for 30-45 minutes of intense cardio at the gym, you are relying on one worker, your heart, to pump hard enough to get blood to all of your cells in a very brief window of time. Wouldn’t it be more cost efficient for your heart to calmly pump blood into your arteries and the other 600 plus workers, your skeletal muscles, to get the blood into your tiny capillaries and hence your cells? If you are running a cell making factory, would you rather have one worker for 30-45 minutes or 600 workers all day long?

Q. Ok, so I’m moving all day long, don’t I still need to get my heart rate up?

Actually, no. Your heart gets plenty strong pumping blood all day long. When you push towards your maximum heart rate, it’s the stress equivalent of being chased by a bear. When your heart goes from a calm, steady rhythm to fast & furious, your body automatically secretes stress hormones and goes through all its fight or flight reactions. This is not good, as many of us already are plagued with constantly high levels of stress hormones.  No matter how much cardio you do, it will never be enough to effectively pump your blood into the tiniest of vessels. You need muscle movement to do this. And you need it all over. And you need it all day. And you can even get more of it at night, if you sleep on the floor.

Q. Uh, how exactly does one move all day long?

  • Walk every day – one long walk or multiple short walks; walk errands that you would otherwise drive.
  • Transition to a standing work station. See my favorite movements for my standing work station.
  • Take a 2 minute movement break every 30 minutes
  • Get a squatting platform for your toilet
  • Install a pull-up bar and hang from it daily; work towards being able to pull yourself up
  • Go to your neighborhood park and play on the children’s play structure. Seriously. Go. Now.
  • Garden with hand tools – shovel & hoe instead of a rototiller; manual push mower instead of gas-powered; clippers instead of a weed eater; watering can instead of a sprinkler.
  • Every choice you make throughout your day, which will be almost every choice you make, ask yourself how can you do it with more movement?

Get moving, there are cells to be made!

Namaste, Michele

In reply to a dead but long living king

I received quite a few comments, on my personal Facebook page, to my article on headstand. Below are my clarifying responses. While I don’t include the original comments from my FB friends, they are fairly obvious within the context of my replies.

Reply to W.

Fan or not, Hector’s study is hugely important to biomechanics literature as it relates to yoga and to yoga literature as it relates to mechanical considerations of asana. There is very little out there that looks at the mechanics of yoga postures and their mechanical consequences. Hector was not trying to prove that loading the neck was bad. She set out to determine how much load is happening, rate of loading, center of pressure, and neck angle; contextualize these findings within what we already know about spine mechanics (lots); and apply this to an increasingly popular and controversial yoga posture. It’s through this extrapolation that one might conclude (me in this case) that unnaturally loading the neck is not good and that sirsasana provides the type of loading known to cause chronic and acute injuries.

You make a great point about loading of the neck not being limited to compressive forces. There are indeed tensile forces loading our cervical spine via our musculature. Buried within the 100+ pages of Hector’s thesis, she references studies that look at the minimal forces shown to cause cervical failure. These force studies, in humans, must be done in cadavers for obvious reasons. So, to account for the activity of surrounding musculature that would be found in a living person, cadavers’ skeletons were anatomically restrained in order to simulate the stabilizing properties of neck musculature. What they found, surprisingly I assume, is that larger fractures and forces were generated. This indicates that muscular stability or restraint may not increase tolerance for higher loads. Other researchers found that age, gender, disease, endocrine function, congenital factors and arthritis all affect tolerance values for cervical failure. Coincidentally, she does discuss African wood bearers, who are practiced at carrying large loads on their heads. In one small study, 90% of male wood bearers exhibited cervical degeneration compared to 23% of the control group. Elimination of natural cervical lordosis was seen, which puts the spine into pre-flexion – a known condition for cervical failure under axial loading. In other studies, females carrying large loads of wood had more prolapsed discs, herniations, and listhesis than those with moderate loads.

Ethically, a clinical study that seeks to prove that neck injuries are caused by certain loads can’t and won’t be performed on living humans, so we have to rely on research studies with cadavers or retrospective studies like those with wood bearers – which may be the closest thing we have to proving cervical loads do indeed cause injuries. When I put all of this together – case studies,  biomechanical studies, anthropological studies with wood carriers, clinical studies  done on glaucoma & blood pressure, and all the anecdotal studies from yoga teachers and practitioners, the evidence is clear, if not overwhelming, that supporting more than 8% of your body weight on your neck is dumb. Even if you do strengthen your cervical bones and other tissues by loading, I can’t imagine you strengthen it over five fold. But, again, the studies have not been done, which is why Hector’s study is so important.

Reply to M.

Iyengar taught, in his books anyway, that the full weight of your body should be on your head in sirsasana. Fortunately, many good teachers, like you, instruct students to place little to no weight on their heads. This better protects the neck, but then you have to consider that most people have meager compressive and tensile loading histories in their shoulders and arms, outside of some planks and possibly pull-ups in the gym/studio. I suspect that loads produced in the shoulders & arms from headstand or handstand far exceed most peoples’ loading histories and capacities. Nobody has studied this that I’m aware of.

The context of fear and empowerment is so important to this discussion. In my early 20’s, I was diagnosed with panic disorder, which was layered on top of a history of generalized anxiety. At age 26, I began rock climbing and that was the beginning of the end of my battle with anxiety. Climbing for me was terrifying, but I persevered (main motivator being I was totally in love with the guy who was taking me climbing:) and through overcoming my fears of heights, hanging belays, run outs, and dynos, I overcame my fear of life. Climbing is inherently dangerous, but 99% of the danger can be mitigated by good choices. What I’m learning about headstand (and shoulder stand) is that even the best choices (alignment, good instruction, acquiring strength, etc.) may not protect you from accumulated damage from putting 50% or more of your body’s weight onto your cervical spine, unless you are levitating your head, which I suspect most people aren’t. Listening to your body and doing what is right for you, while in most cases is sound advice, may not override the truth of biomechanics when it comes to standing on your head.

Reply to J.

I applaud you for recognizing your “youth” as a teacher and putting your student’s before your ego. I wish I had showed the same restraint. It took me a while before I realized that just because I can do a headstand, arm balance, etc., it doesn’t mean I have the maturity in my practice to teach it. And, for what is now paramount to me, it does not mean that I understand their impact on biomechanics well enough to be teaching them to students, whose movement and loading histories I don’t know well. I’m not sure, though, if “feeling good” is always a good marker for the safety of a posture like sirsasana. Much of what I’ve read in the case studies and in the personal stories of long term yoga practitioners discusses cervical spine injuries as more chronic or cumulative in nature – not of the burst fracture type – but of accumulated damage from unnatural loading on insidiously degenerating discs and bone density-compromised vertebra. Most of these practitioners “felt good” for those years they were doing sirsasana, until they didn’t.

Reply to H.

You are right; the Hector study did not look at duration in headstand as a risk factor for cervical injury. However, earlier studies of headstand related to glaucoma found that duration positively correlates to increased intraocular pressure. I would posit that greater duration would be associated with fatigue, thus disrupting ecological balance between arm/shoulder forces and head forces. Your advice to students not to kick their legs up in sirsasana, and to work on having the strength to weight ratio to lift them in a controlled, symmetrical manner, certainly aligns with Hector’s study. As for shoulder stand…. it is another posture that has not fared well in the medical literature…more to come.

Reply to a different M

Hector’s study showed repeated loading of the head and neck due to intrinsic bouncing and weight shifts between the arms and head. Unless you were completely levitating your head from the ground (were you?), it seems like you would be unable to completely remove loading forces from your neck. I  would love to hear your technique.

Reply to R**

I edited my post to say the following: “I’ve been in many yoga classes, where headstand was cued, but few of them came with warnings about headstand’s potential effects on glaucoma, detached retina’s, neck issues, or uncontrolled blood pressure.” I appreciate the feedback that helps me to clarify what I really mean.

** R is a former teacher of mine and has reached the Intermediate Junior I level in her Iyengar teacher training, which is frankly badass in the exquisitely rigorous training curriculum and testing process that is Iyengar (don’t let “intermediate” and “junior” fool you, this is a remarkable accomplishment). Originally, I said that I had never had a teacher give contraindications for glaucoma, when instructing sirsasana. R challenged me on this. I have taken classes/workshops from a handful or formally trained Iyengar teachers but it has been some years and I don’t recall these contraindications, but I don’t trust my memory either. However, in recent memory, in local and regional studios in the last year or so, I can remember specific times when the warning was not given, because I was listening for it. That is a more fair statement.

General reply to all

I wrote this article from a teacher’s perspective. But as a student/practitioner, I have a different relationship with the King. Ironically, I used sirsasana as a therapeutic exercise (protocol of Loren Fishman that I referenced in my article) after I tore my labrum from the bone and partially tore my supraspinatus showing off  in downward dog. I credit sirsasana with my near miraculous, almost full recovery.

Namaste, Michele